You’ve been scrolling through dessert recipes for weeks, haven’t you? Maybe you tried a few gluten-free lemon bars that turned out crumbly or too sweet. Or worse, they tasted like cardboard with a hint of citrus.
Here’s what most recipes won’t tell you: getting that perfect balance between tangy and sweet while keeping the texture just right isn’t complicated.
You don’t need fancy ingredients or a culinary degree. What you need is the right method and a little patience. This recipe will change how you think about gluten-free baking. Ready to find out what makes it different?
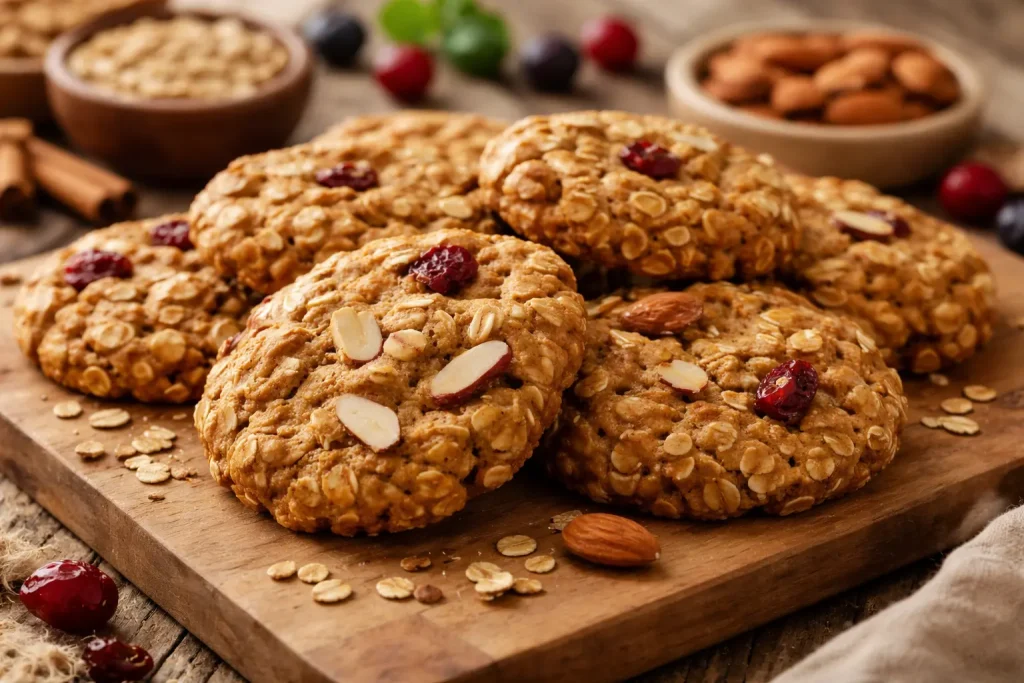
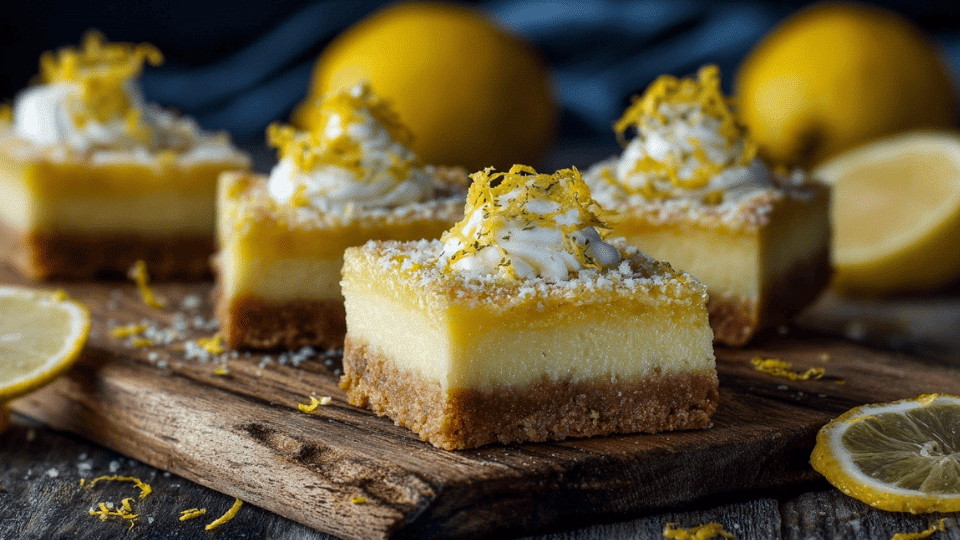
What Are Gluten-Free Lemon Bars?
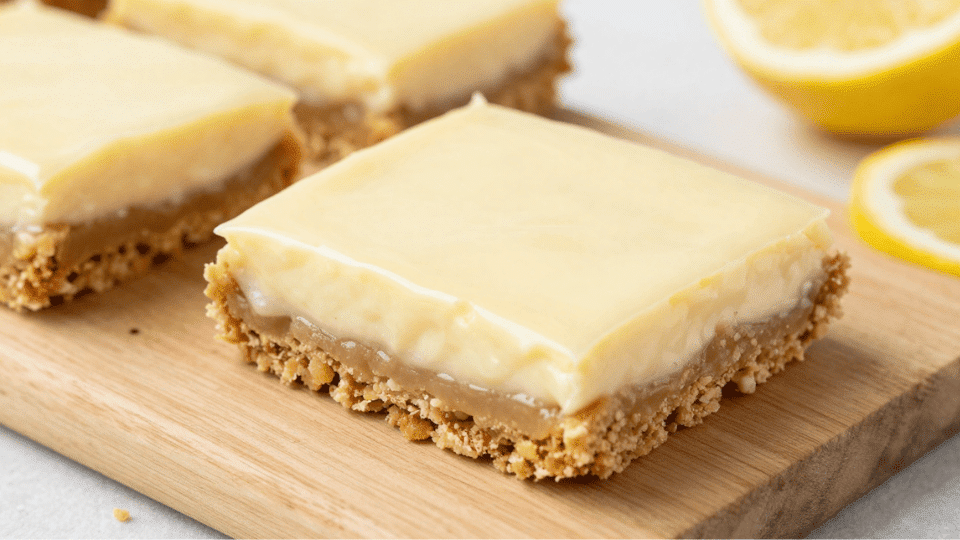
Think of them as a two-layer dessert. The bottom is a buttery, shortbread-like crust. The top is a smooth, tangy lemon filling that sets as it bakes.
Traditional versions use regular flour, but this one swaps it for gluten-free alternatives. You still get that same satisfying texture, crisp on the bottom and creamy on top.
The lemon flavor shines through without being too sour, and the sweetness balances everything out. They’re cut into squares, dusted with powdered sugar, and honestly? They taste just as good as the original.
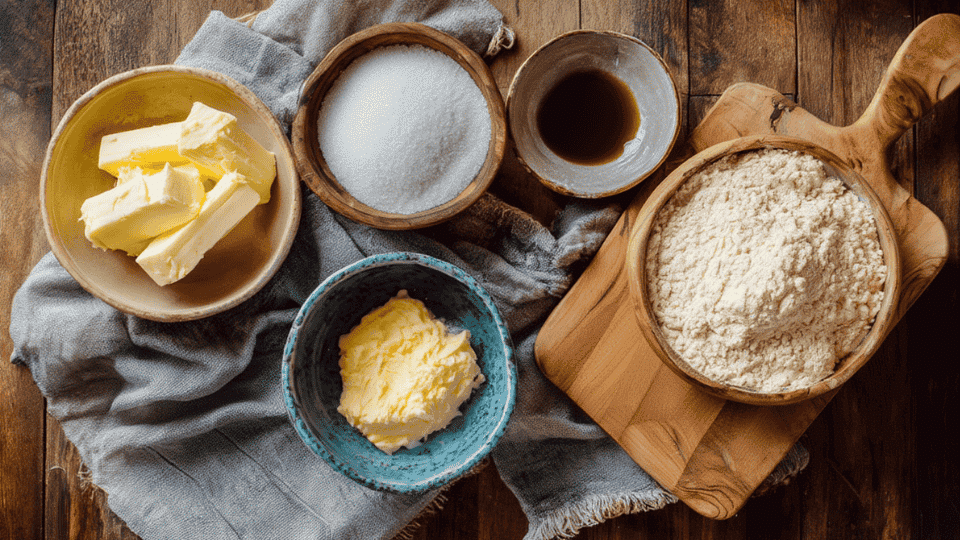
Ingredients You’ll NeedFor the Shortbread Crust:
For the Lemon Filling:
|
How to Make Gluten-Free Lemon Bars
Making gluten-free lemon bars is super simple, and the result is a sweet, tangy treat that everyone will love. With just a few steps, you’ll have these buttery bars ready to enjoy. Let’s get baking!
Step 1: Prepare the Shortbread Crust
Preheat your oven to 350°F (175°C). In a bowl, mix the gluten-free flour, sugar, and salt. Add the cubed cold butter and vanilla extract, then use a pastry cutter or your hands to blend until the mixture looks like coarse crumbs. Press this dough into the bottom of an 8×8-inch baking pan and bake for 15 minutes until lightly golden.
Step 2: Make the Lemon Filling
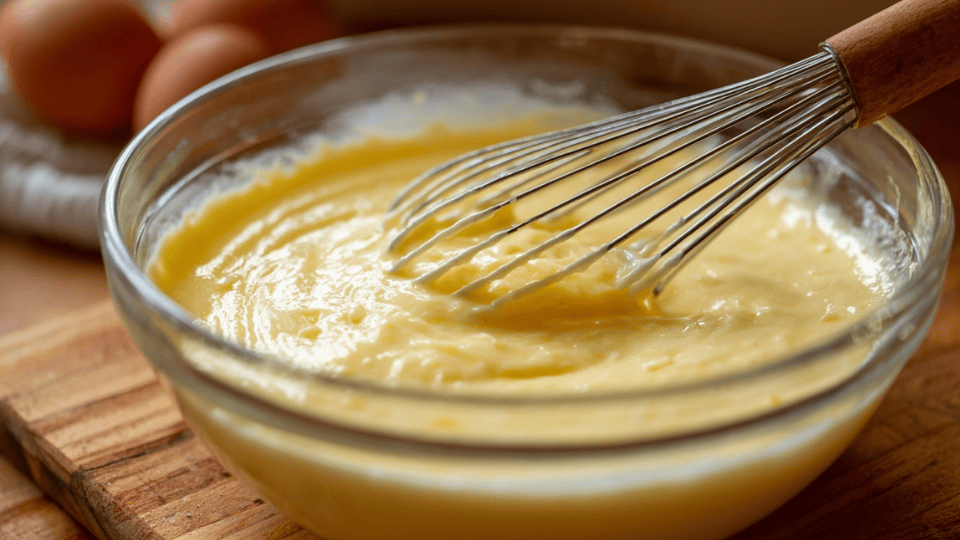
In a medium bowl, whisk together the eggs, sugar, gluten-free flour, lemon zest, lemon juice, and salt until smooth. You want a creamy mixture with no lumps. Pour this filling over the pre-baked crust and smooth it out with a spatula to cover evenly.
Step 3: Bake the Lemon Bars
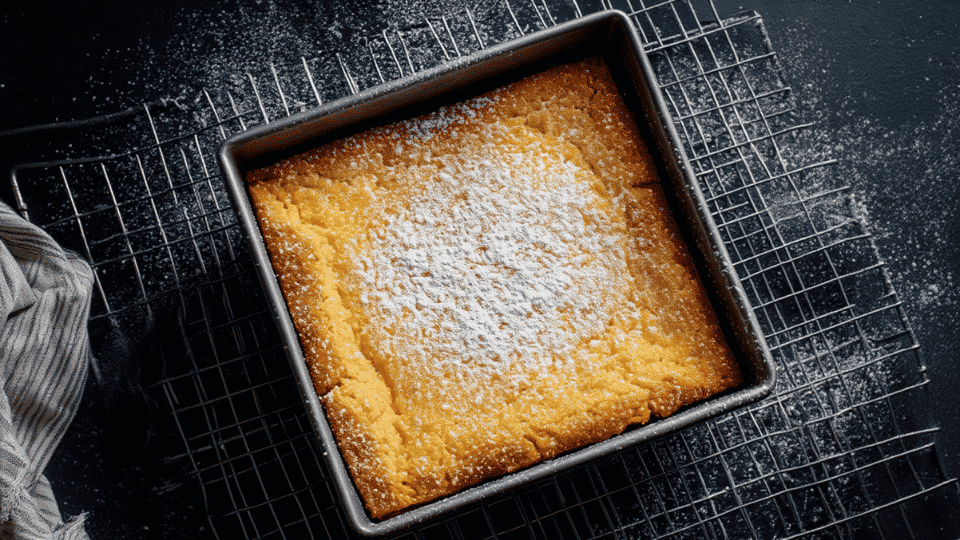
Return the pan to the oven and bake for an additional 20–25 minutes, or until the center is set but still slightly jiggly. The top will firm up while it cools. Keep an eye on them; you don’t want to overbake and dry them out.
Step 4: Cool and Serve
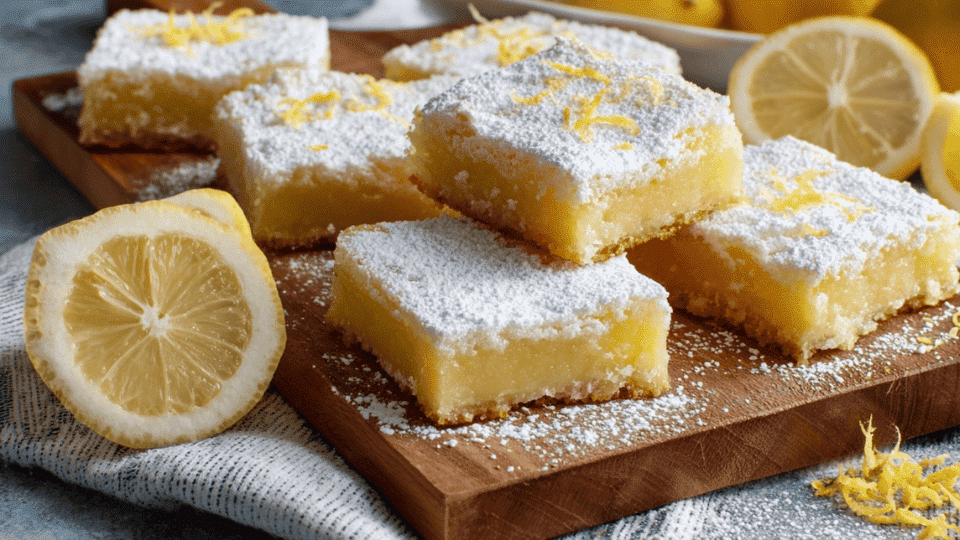
Once baked, remove the pan from the oven and let it cool completely on a wire rack. For best results, chill the lemon bars in the fridge for an hour before cutting them into squares. Dust with powdered sugar before serving for that perfect finishing touch.
Now, you’re all set to enjoy your homemade gluten-free lemon bars! They’re perfect for any occasion and sure to be a crowd favorite.
RecipeNotes
These quick reference notes will help you keep things on track while making your gluten-free lemon bars. From prep to baking, following these details will ensure your bars turn out perfectly every time.
| Note | Details |
|---|---|
| Prep Time | 10 minutes |
| Cook Time | 35 minutes (15 minutes for crust + 20-25 minutes for filling) |
| Total Time | 45 minutes |
| Servings | 9-12 bars (depending on slice size) |
| Method | Bake |
| Difficulty | Easy |
Now you’re ready to bake with confidence! With these notes in hand, you’ll create perfect gluten-free lemon bars every time. Enjoy sharing them with your friends and family!
Best Gluten-Free Flours for Lemon Bars
Not all gluten-free flours work the same way. Some make your crust too gritty, while others leave it falling apart. Here’s what actually works:
- 1:1 Gluten-Free Baking Flour: This is your easiest option. It already has xanthan gum mixed in, so you can swap it directly for regular flour without changing anything else.
- Almond Flour: Gives you a richer, nuttier crust. It’s naturally moist, so your bars won’t dry out. Just know it browns faster than other flours.
- Oat Flour: A budget-friendly choice that keeps the texture soft. Make sure the label says “certified gluten-free” if you’re sensitive.
- Rice Flour Blend: Works well when mixed with starches like tapioca or potato starch. On its own, it can be a bit grainy.
Pick one based on what you have and what texture you’re after. You really can’t go wrong. The rest of the recipe stays the same no matter which flour you choose.
Ina Garten Lemon Bars
Want to try a more classic take on lemon bars? If you’re looking for a classic lemon bar recipe, Ina Garten’s take on these tangy treats is a must-try.
What sets her recipe apart is the use of fresh lemon juice and zest, which add a bright, vibrant flavor. With a simple swap to gluten-free ingredients, you can now enjoy her classic recipe without compromising on taste or texture.
Ingredients You’ll Need
|
Cooking Instructions
Now that you’ve gathered your ingredients, it’s time to make these gluten-free lemon bars. Follow these simple steps to create a sweet, tangy treat everyone will love!
- Step 1: Prepare the Shortbread Crust: Preheat the oven to 350°F (175°C). Combine flour, sugar, and salt. Add butter and vanilla, then blend until crumbly. Press into an 8×8-inch pan and bake for 15 minutes.
- Step 2: Make the Lemon Filling: Whisk eggs, sugar, flour, lemon zest, juice, and salt until smooth.
- Step 3: Bake the Lemon Bars: Pour filling over the crust and bake for 20-25 minutes, until the center is set and lightly golden.
- Step 4: Cool and Serve: Let the bars cool completely, then refrigerate for an hour. Dust with powdered sugar before serving.
Enjoy these gluten-free Ina Garten-inspired lemon bars at your next gathering. They’re the perfect balance of sweet and tangy, and sure to be a hit!
Creative Twists on Classic Gluten-Free Lemon Bars
Once you’ve nailed the basic recipe, why stop there? You can switch up flavors, swap ingredients, or add a little something extra. Here are some variations that’ll keep things interesting:
1. Dairy-Free Gluten-Free Lemon Bars
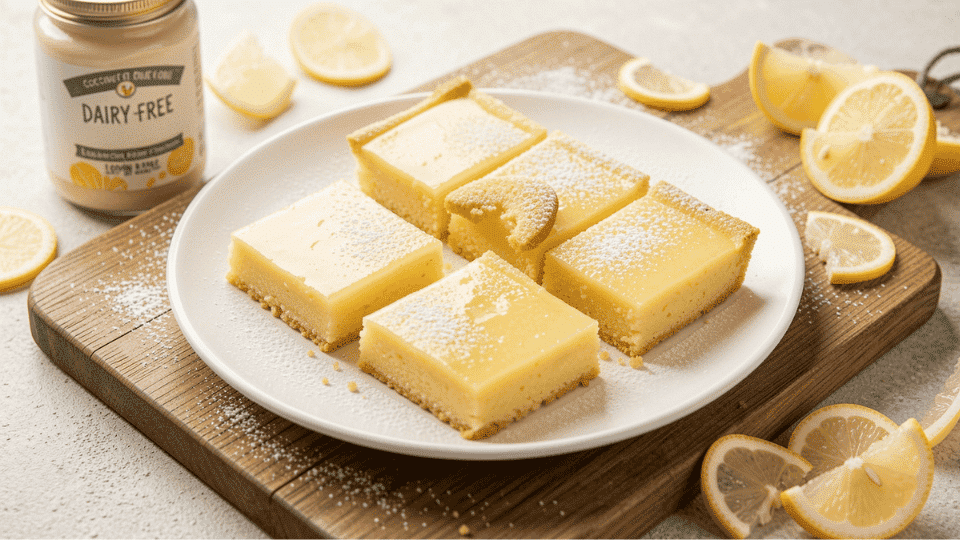
Swap butter for coconut oil or vegan butter in both the crust and filling. The coconut oil adds a subtle flavor that pairs well with lemon.
- Ingredients: You’ll need 1/2 cup chilled coconut oil, 1/4 cup coconut cream (instead of heavy cream), and 1 1/2 cups gluten-free flour blend.
- How to make it: Mix chilled coconut oil into your dry ingredients until the mixture is crumbly. Press into the pan and bake. For the filling, whisk coconut cream with eggs, lemon juice, and sugar. Pour over the crust and bake until set.
2. Vegan Lemon Bars

This version skips eggs and dairy completely. You’ll need a thickener like cornstarch to get that creamy filling. The trick here is getting the right consistency without eggs, but it’s easier than you’d think.
- Ingredients: Grab 1/2 cup vegan butter, 3 tablespoons cornstarch or arrowroot powder, 1 cup non-dairy milk, and 1 teaspoon agar powder if you want extra firmness.
- How to make it: Make the crust with vegan butter and bake it first. For the filling, whisk cornstarch, sugar, lemon juice, and non-dairy milk on the stove until thick. Pour it over the crust and chill in the fridge for a few hours.
3. Meyer Lemon Bars
Meyer lemons are sweeter and less acidic than regular lemons. They give you a more floral, honey-like flavor. If you’ve never tried them, you’re in for a treat.
- Ingredients: You’ll need 1/2 cup fresh Meyer lemon juice, 2 tablespoons Meyer lemon zest, standard gluten-free crust ingredients, and about 2 tablespoons less sugar than usual since Meyer lemons are sweeter.
- How to make it: Follow your usual recipe, but use Meyer lemon juice and zest instead. You might want to cut back on sugar by a tablespoon or two since these lemons aren’t as tart.
4. Blueberry Lemon Bars
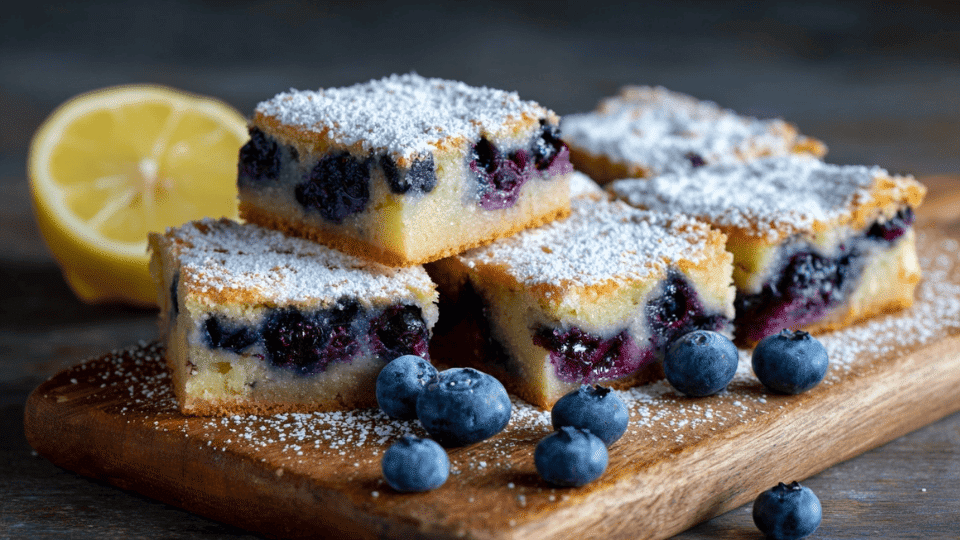
Adding blueberries gives you bursts of sweetness and a nice color contrast. Fresh or frozen, both work. The berries soften as they bake, creating small pockets of jam throughout the lemon layer. It’s like getting two desserts in one bite.
- Ingredients: Use 1 cup fresh or frozen blueberries, 1/3 cup lemon juice, 1 tablespoon lemon zest, and 1 tablespoon cornstarch to thicken the berry juice.
- How to make it: Toss blueberries with a bit of cornstarch and fold them into your lemon filling before pouring. Or scatter them on top of the crust before adding the filling. Bake as usual.
5. Lavender Lemon Bars
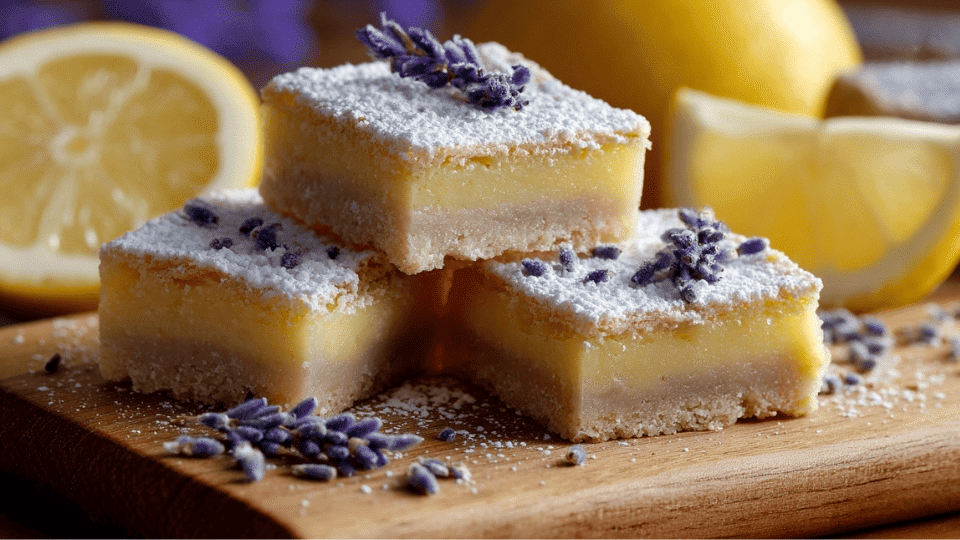
A tiny bit of lavender turns these into something fancy. Don’t overdo it, or they’ll taste like soap. When done right, the lavender adds a delicate floral note that makes people ask what your secret ingredient is.
- Ingredients: You’ll need 1-2 teaspoons dried culinary lavender (max), 1/3 cup lemon juice, 1 tablespoon lemon zest, and your standard crust and filling ingredients.
- How to make it: Steep dried lavender in warm cream or melted butter for 10 minutes, then strain it out. Use this infused liquid in your filling. The flavor should be subtle, just a hint in the background.
6. Blood Orange Bars
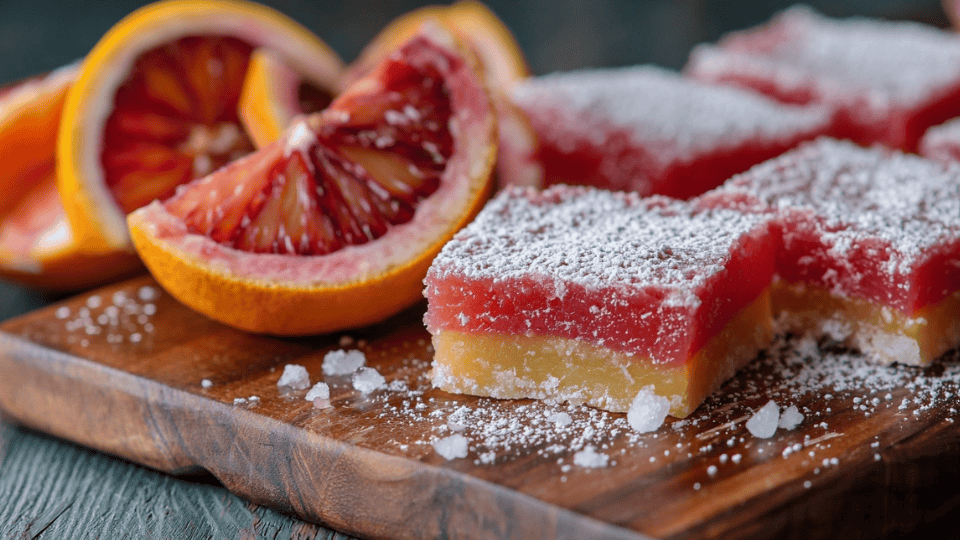
Blood oranges have a deeper, slightly berry-like flavor. They also turn your filling a gorgeous pink-red color. The color alone makes these stand out on any dessert table.
- Ingredients: Get 1/3 cup fresh blood orange juice, 1 tablespoon blood orange zest, 1 tablespoon lemon juice for extra tang, and your standard gluten-free crust ingredients.
- How to make it: Replace most or all of the lemon juice with blood orange juice. Keep a tablespoon of lemon juice for extra tang. The color will vary depending on how red your oranges are.
7. Low-Sugar Lemon Bars

You can cut the sugar down without losing flavor. Stevia or monk fruit sweetener works here. These are perfect if you’re watching your sugar intake but still want dessert. The lemon flavor actually shines through more when you dial back the sweetness.
- Ingredients: Use 1/2 cup sugar substitute like erythritol or monk fruit, 2 tablespoons lemon zest for extra flavor, and your standard gluten-free ingredients.
- How to make it: Replace half the sugar with your chosen sweetener. Add extra lemon zest to make up for the lost sweetness and depth. Taste your filling before baking and adjust if needed.
8. Graham Cracker Crust Lemon Bars
If you want something different from shortbread, try a graham cracker crust. It’s easier and adds a slightly toasted flavor. You don’t even need to make dough from scratch just crush, mix, and press. It gives you that classic cheesecake-style base with way less work.
- Ingredients: Crush 1 1/2 cups gluten-free graham crackers into fine crumbs, add 6 tablespoons melted butter, and a pinch of salt.
- How to make it: Crush the crackers into fine crumbs. Mix with melted butter and press into your pan. Bake for 8-10 minutes until golden. Let it cool slightly before adding your lemon filling.
Try one or mix and match ideas. You might find a combination you like even better than the original. Don’t be afraid to experiment with your own twists, too.
If you’re looking to try more gluten-free desserts, peanut butter balls are another easy and tasty option.
Nutritional Facts
These gluten-free lemon bars are a delightful treat that you can enjoy without compromising on flavor. Below is the nutritional breakdown per serving.
| Nutrient | Amount per Serving ( 1 bar) |
|---|---|
| Calories | 220 kcal |
| Total Fat | 14g |
| Saturated Fat | 8g |
| Cholesterol | 40mg |
| Carbohydrates | 25g |
| Fiber | 1g |
| Sugar | 18g |
| Protein | 2g |
Disclaimer: Nutritional information is an estimate based on the provided ingredients and may vary depending on ingredient brands and serving sizes.
Storage & Make-Ahead Tips
These bars actually taste better the next day once the flavors have had time to settle. You can make them ahead and store them properly so they’re ready whenever you need them.
- Refrigerator Storage: Keep them in an airtight container in the fridge for up to 5 days. Layer parchment paper between stacks to prevent them from sticking together.
- Freezer Storage: Wrap individual bars in plastic wrap, then put them all in a freezer bag. They’ll last up to 3 months frozen. Thaw in the fridge overnight before eating.
- Make-Ahead Crust: You can bake the crust a day early and keep it covered at room temperature. Just add the filling and finish baking when you’re ready.
- Powdered Sugar Timing: Wait to dust them with powdered sugar until right before serving. It absorbs moisture and gets soggy if you do it too early.
Plan ahead, and you’ll always have dessert ready. Just pull them out when guests show up or when you need something sweet.
The Bottom Line
You’ve got everything you need to make gluten-free lemon bars that’ll have people asking for the recipe. From choosing the right flour to trying fun variations like blood orange or lavender, you’re set up to succeed.
The method is straightforward, and most of the ingredients are probably already in your kitchen. These bars work for potlucks, weekend baking, or just because you’re craving something citrusy and sweet.
Test out different versions and see which one becomes your go-to. Your friends won’t believe these are gluten-free, and honestly, that’s the biggest compliment you can get. Stop scrolling through recipes and start baking.
Ready to make your first batch? Try the recipe today and let us know how it turns out!
Frequently Asked Questions
What Is the Trick to Baking with Gluten-Free Flour?
Use a gluten-free flour blend with binders like xanthan gum to mimic the texture of wheat flour. Adjust liquids as needed.
What Makes a Lemon Bar Taste the Best?
Fresh lemon juice and zest add vibrant flavor, while a buttery, crumbly crust balances the sweetness and tang.
Can I Use Bottled Lemon Juice for Making Lemon Bars?
Bottled lemon juice works, but fresh lemons provide a brighter, more natural flavor that enhances the taste of the bars.