Have you ever bitten into a Crumbl cookie and wondered if you could make that magic at home? Good news, you totally can!
This red velvet Crumbl cookie copycat recipe gives you those thick, bakery-soft cookies without leaving your kitchen.
These cookies are everything you love about the famous chain. They’re big, soft in the middle, and have that perfect, slightly crisp edge. Plus, we’re topping them with the dreamiest cream cheese frosting.
You’ll learn exactly how to make red velvet cookies with cream cheese frosting that taste just like the real deal.
We’ll cover the ingredients, the tricks for getting that Crumbl-style thickness, and how to nail the frosting every time. Let’s bake!
Why You’ll Love This Red Velvet Crumbl Cookie Copycat
This recipe gives you the best of both worlds: thick, soft centers with slightly crisp edges. It’s that perfect cookie texture you crave from a fancy bakery, but made right in your own kitchen.
The best part? You don’t need any fancy equipment or hard-to-find ingredients. Everything comes together with simple pantry staples.
The bakery-style cream cheese frosting is smooth, tangy, and perfectly sweet. It takes these cookies from great to absolutely amazing.
Plus, the dough is freezer-friendly, so you can make it ahead and bake fresh cookies whenever you want. That makes this recipe perfect for parties, holiday gifts, or just satisfying a late-night cookie craving!
What Makes a Crumbl-Style Cookie Different?
Crumbl cookies aren’t your average homemade cookies. They’re known for being huge, super thick, and incredibly soft. So what’s the secret?
First, the size matters. These cookies are much bigger than regular ones, we’re talking about 4 inches across! Second, they stay thick instead of spreading flat.
Third, they’re slightly underbaked, which keeps the centers soft and gooey. This recipe copies all of that. We use chilled dough so the cookies don’t spread too much.
The recipe has a higher fat and sugar ratio, which creates that tender texture. And we shape the dough into tall mounds before baking. These simple tricks give you that authentic Crumbl experience right at home.
Ingredients You’ll NeedFor the Red Velvet Cookies
For the Cream Cheese Frosting
|
Ingredient Swap Tips: You can use salted butter, just skip the added salt. Natural cocoa or Dutch-processed both work. For food coloring, gel gives the brightest red, but liquid works too (you’ll just need more).
Recipe Notes
| Detail | Time/Amount |
|---|---|
| Prep Time | 20 minutes |
| Chill Time | 30-60 minutes |
| Bake Time | 10-12 minutes |
| Total Time | About 1 hour 15 minutes |
| Category | Dessert |
| Method | Baking |
| Cuisine | American |
| Yield | 8-10 large cookies |
Make Red Velvet Crumbl Cookies: Step-by-Step
Now it’s time to bring everything together. Follow these simple steps to create thick, soft, bakery-style cookies that taste just like the real thing.
Step 1: Cream the Butter and Sugars

Start by adding softened butter, granulated sugar, and brown sugar to a large mixing bowl.
Beat them together until the mixture is light and fluffy. This takes about 2-3 minutes. Creaming properly adds air to the dough, which helps create that soft texture.
Step 2: Add the Wet Ingredients
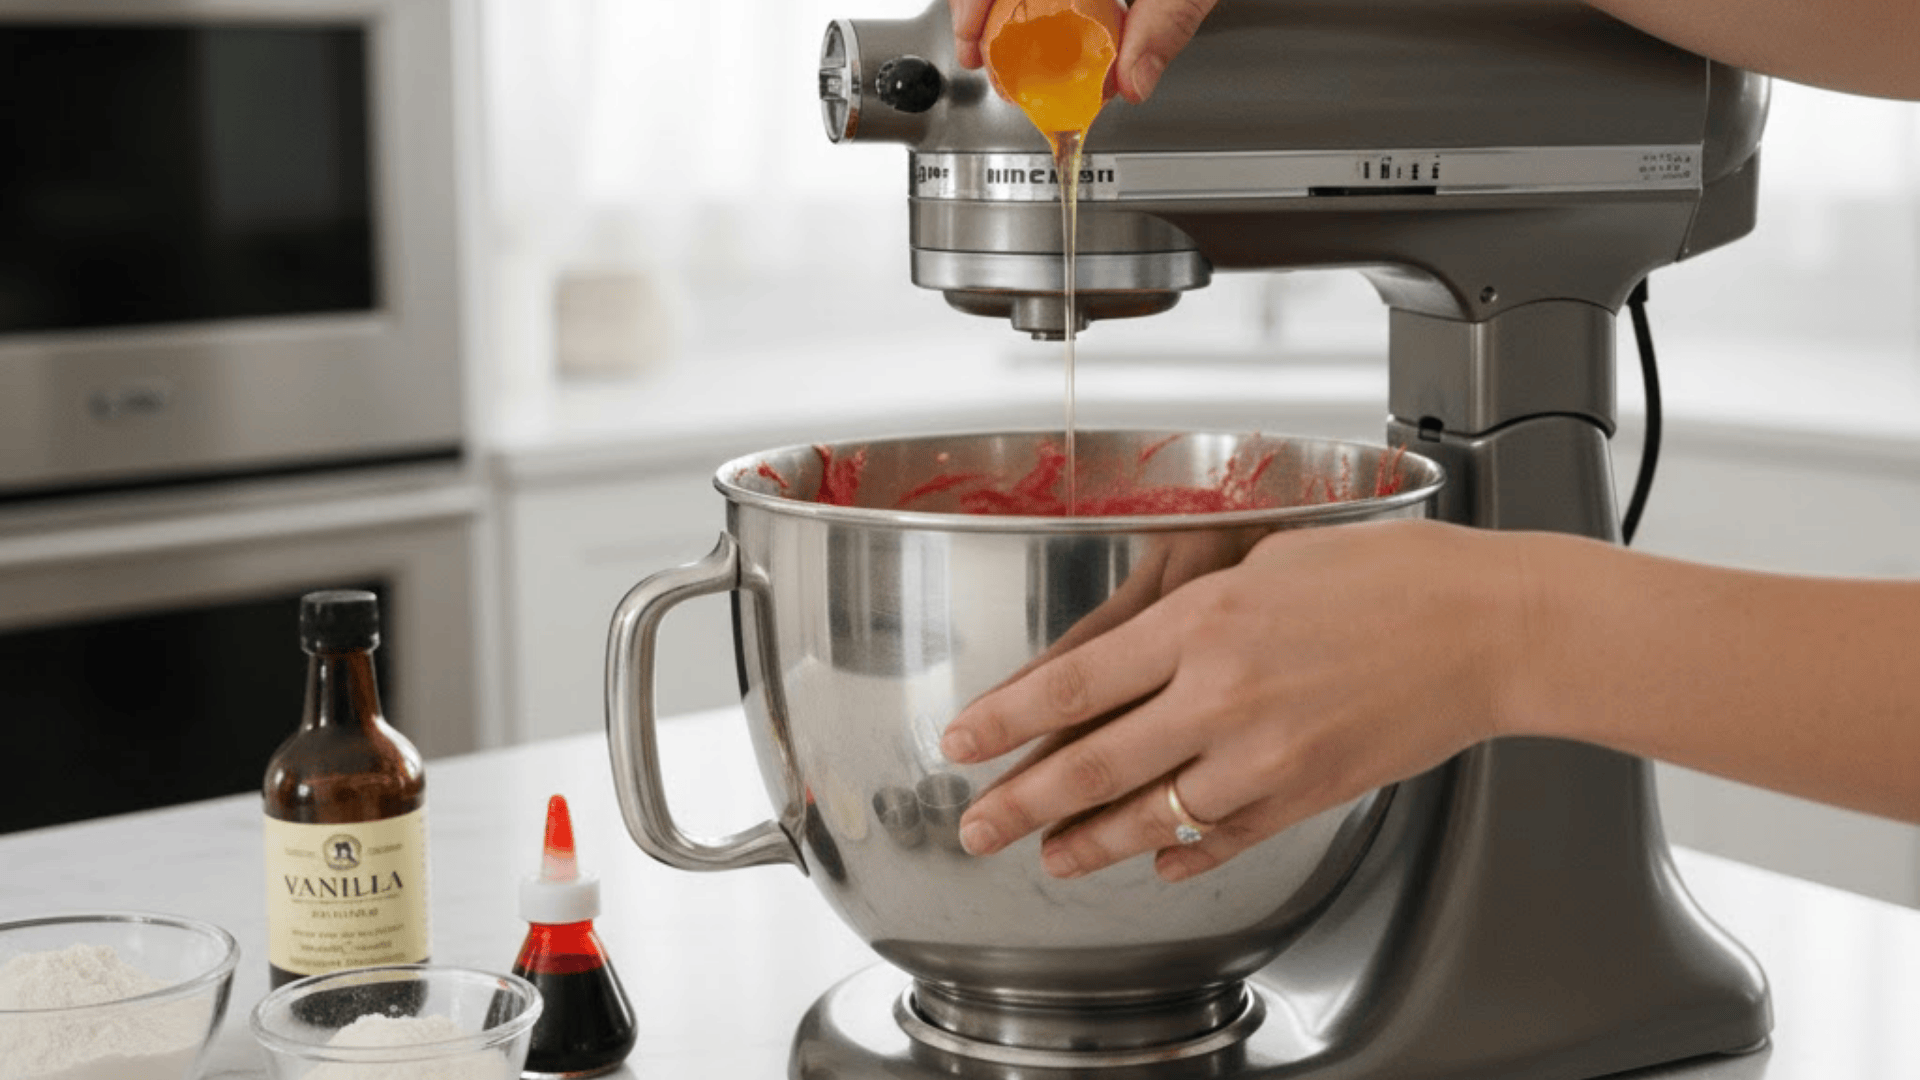
Add your eggs one at a time, mixing well after each one. Then pour in the vanilla extract and red food coloring.
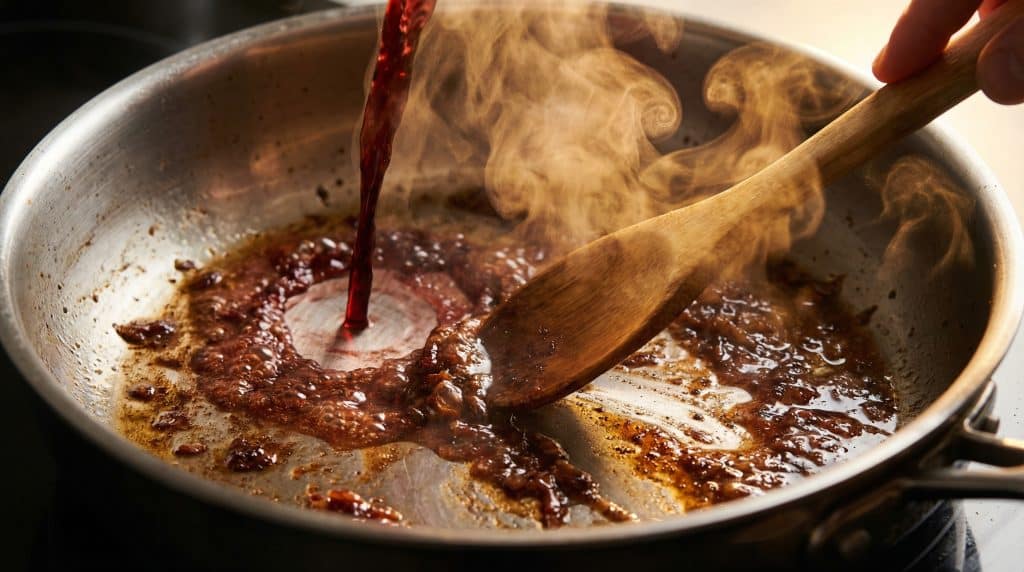
Mix until the color is even throughout the dough. If you’re using vinegar or buttermilk for that classic red velvet tang, add it now.
Step 3: Combine the Dry Ingredients

In a separate bowl, whisk together the flour, cocoa powder, baking soda, and salt. Slowly add the dry ingredients to the wet mixture. Mix until just combined.
Important: Don’t overmix! Overmixing makes cookies tough instead of soft. Stop as soon as you don’t see any more flour streaks.
Step 4: Chill the Dough
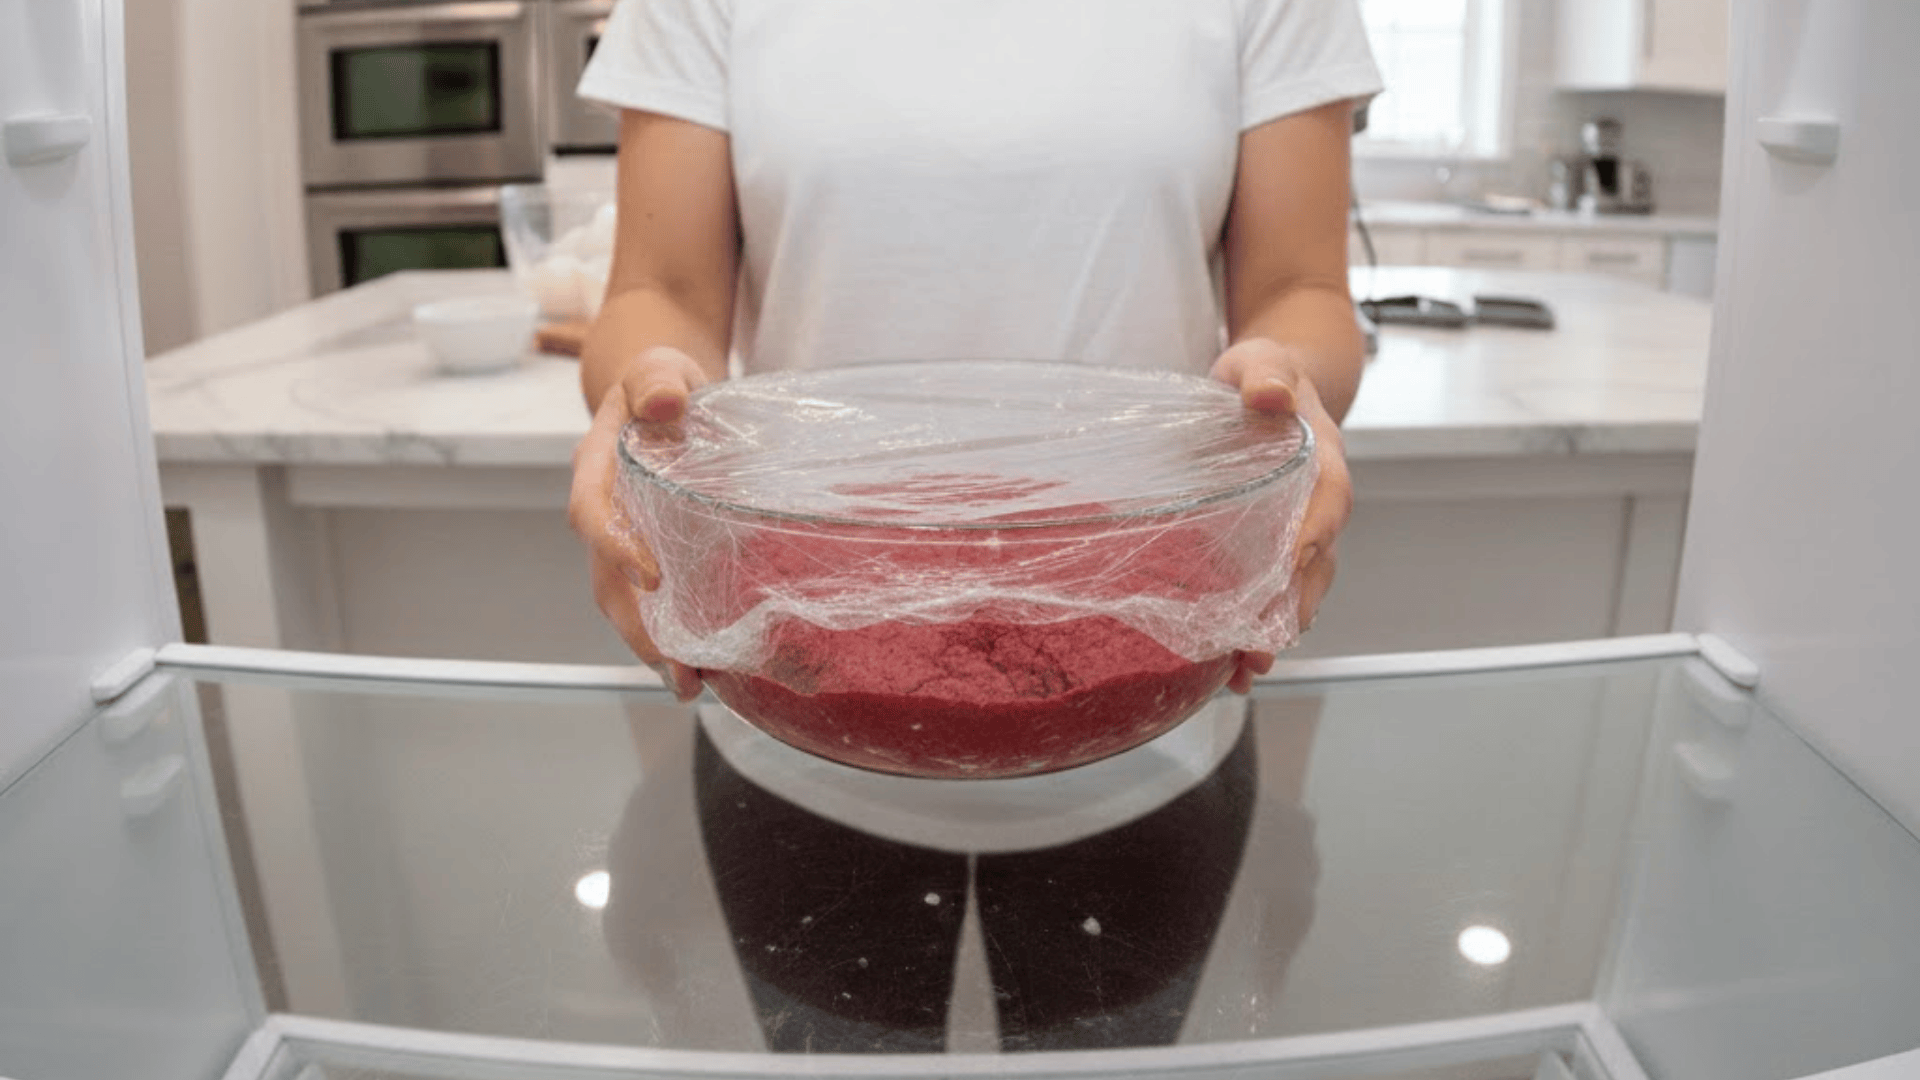
Cover your dough and refrigerate for 30-60 minutes. This step is super important, don’t skip it! Cold dough spreads more slowly in the oven, which means your cookies stay thick and puffy instead of turning into flat discs.
Step 5: Portion and Shape Like Crumbl
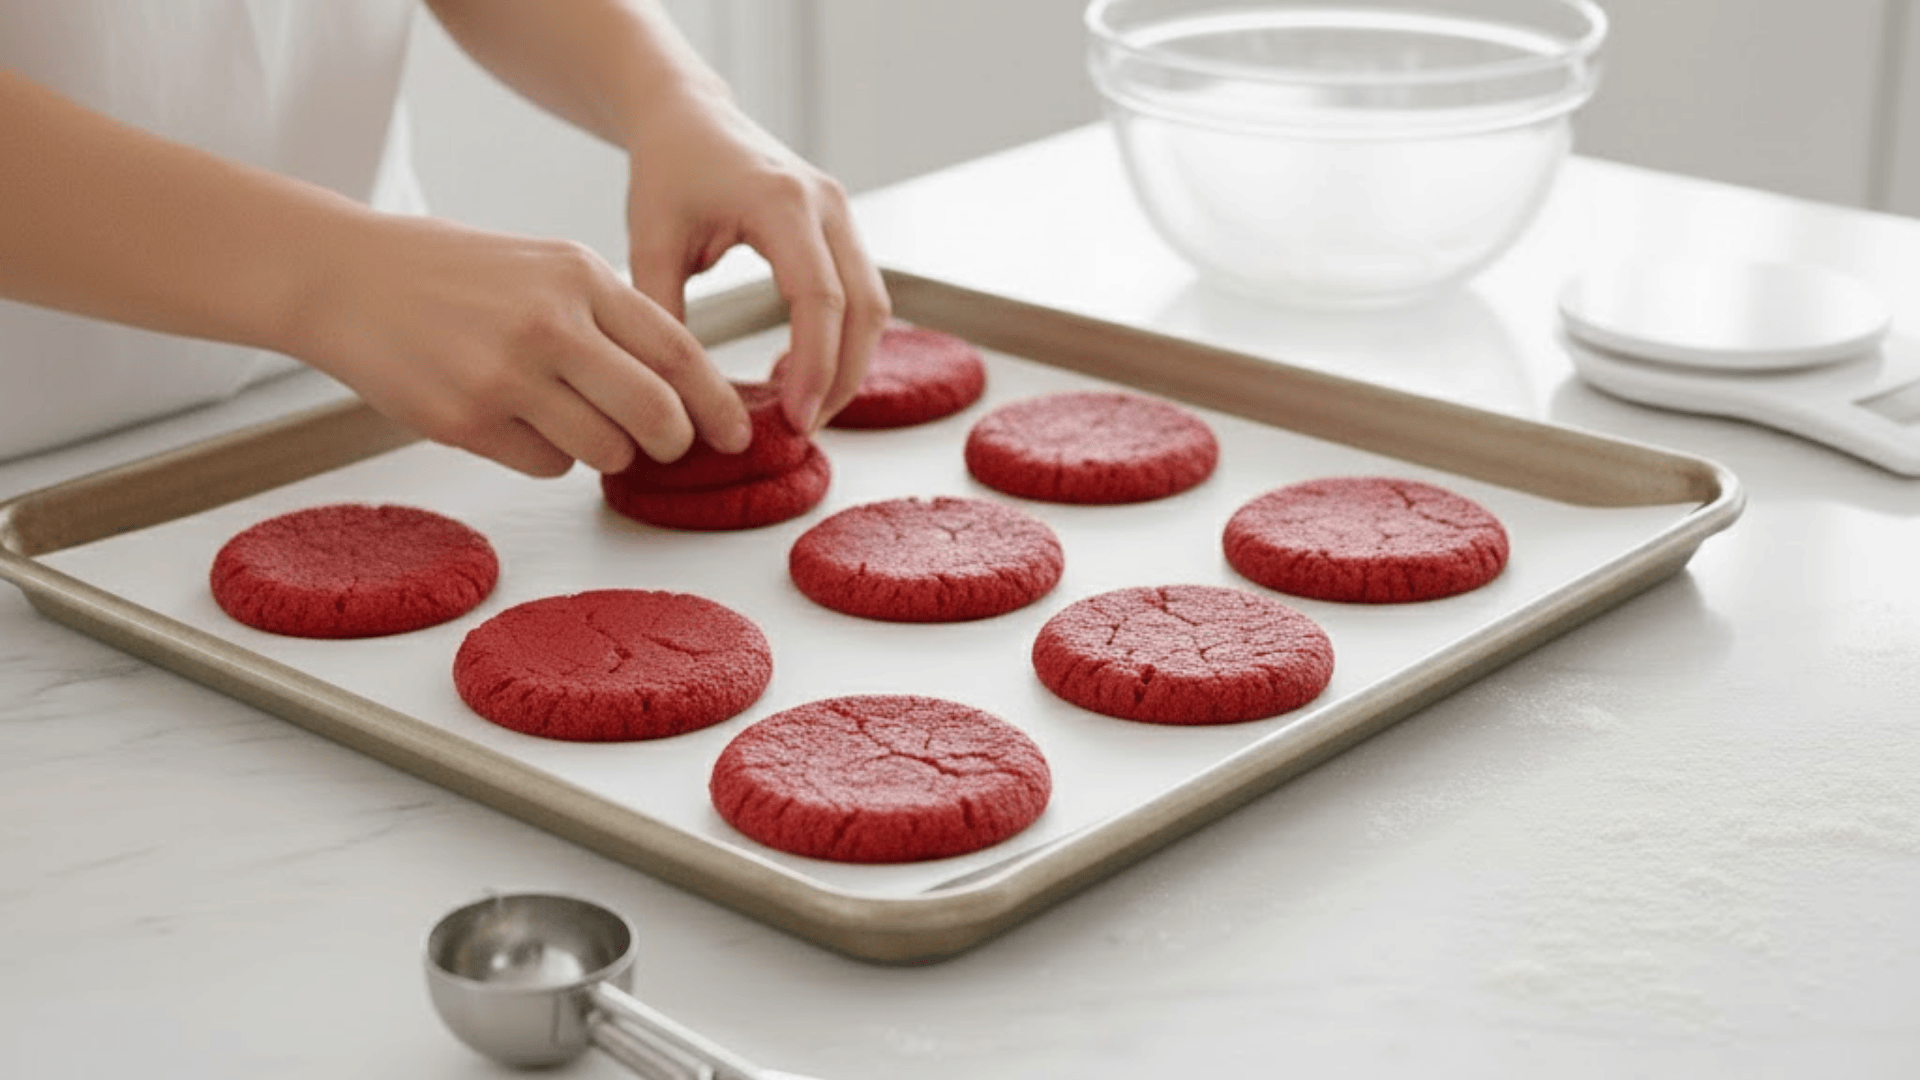
Crumbl cookies are BIG. Each cookie should be about 90-110 grams of dough, roughly 3-4 tablespoons per cookie.
Scoop out your portions and roll each one into a ball. The trick is to shape each ball into a tall mound instead of flattening it. The cookies will spread in the oven, so starting tall keeps them thick.
Pro Tip: Keep all portions the same size and space them at least 3 inches apart on your baking sheet for uniform baking.
Step 6: Bake to Perfection
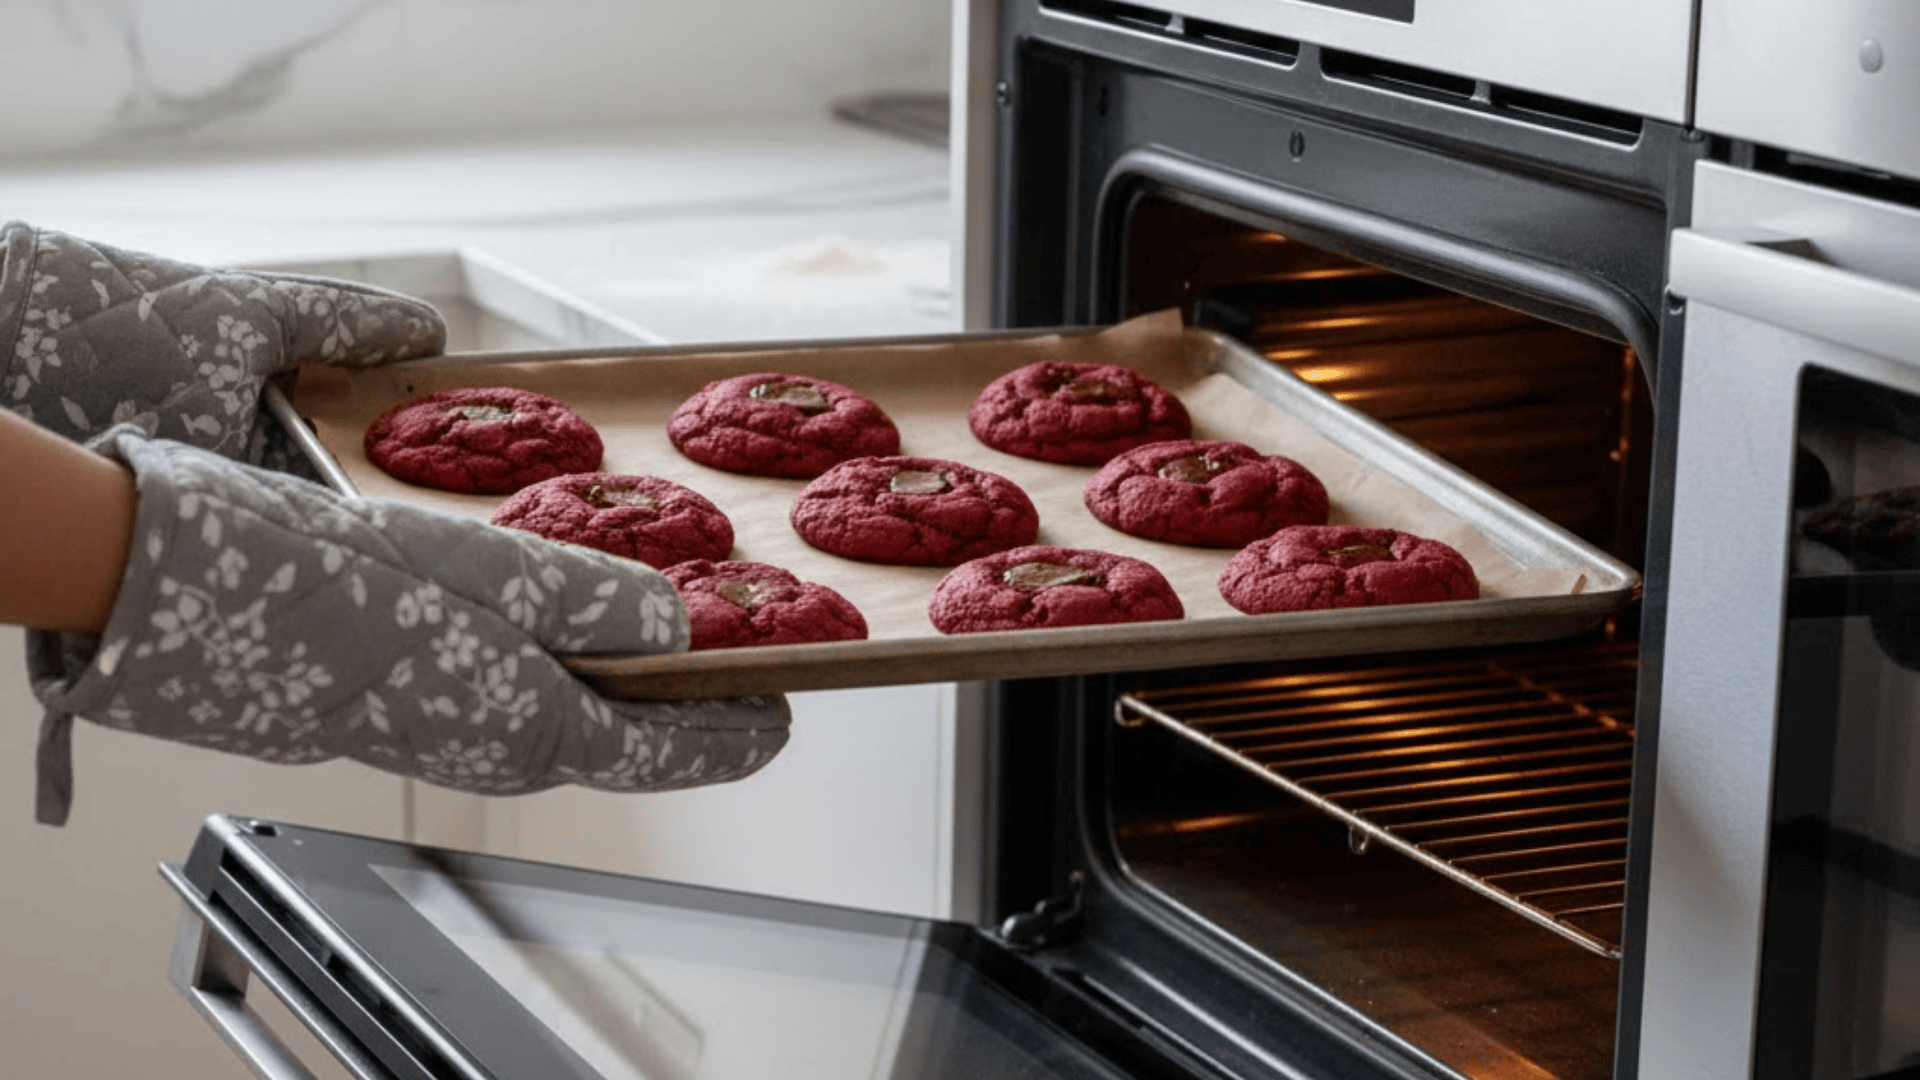
Preheat your oven to 350°F (175°C). Bake the cookies for 10-12 minutes. Watch for these visual cues: the edges should look set and slightly golden, but the centers should still look soft and almost underdone.
This is normal! The cookies continue cooking on the hot baking sheet after you take them out.
Step 7: Cool Before Frosting
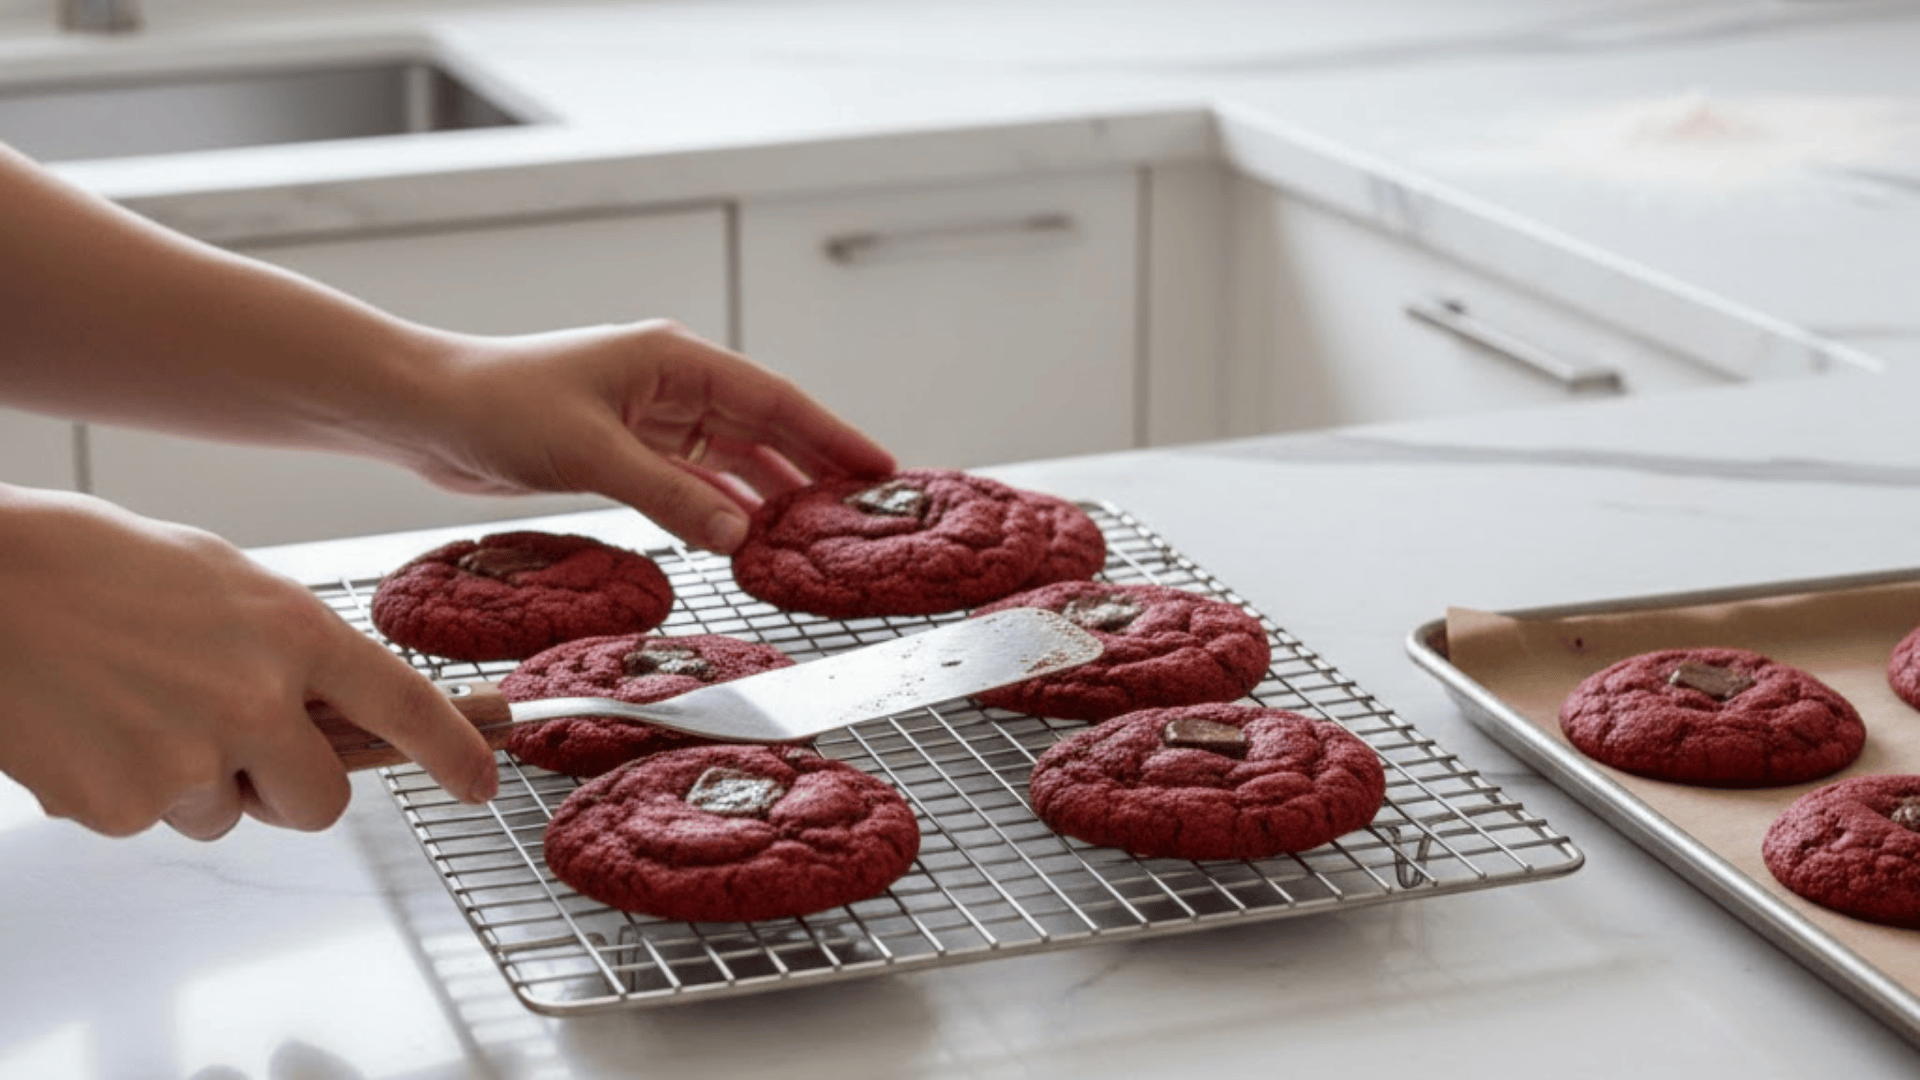
Let the cookies cool on the baking sheet for at least 10 minutes before moving them to a cooling rack. They need time to set up, and the centers will firm up as they cool.
Wait until they’re completely cool before adding frosting; warm cookies will melt the frosting right off.
Cream Cheese Frosting (Smooth, Pipeable, Not Runny)
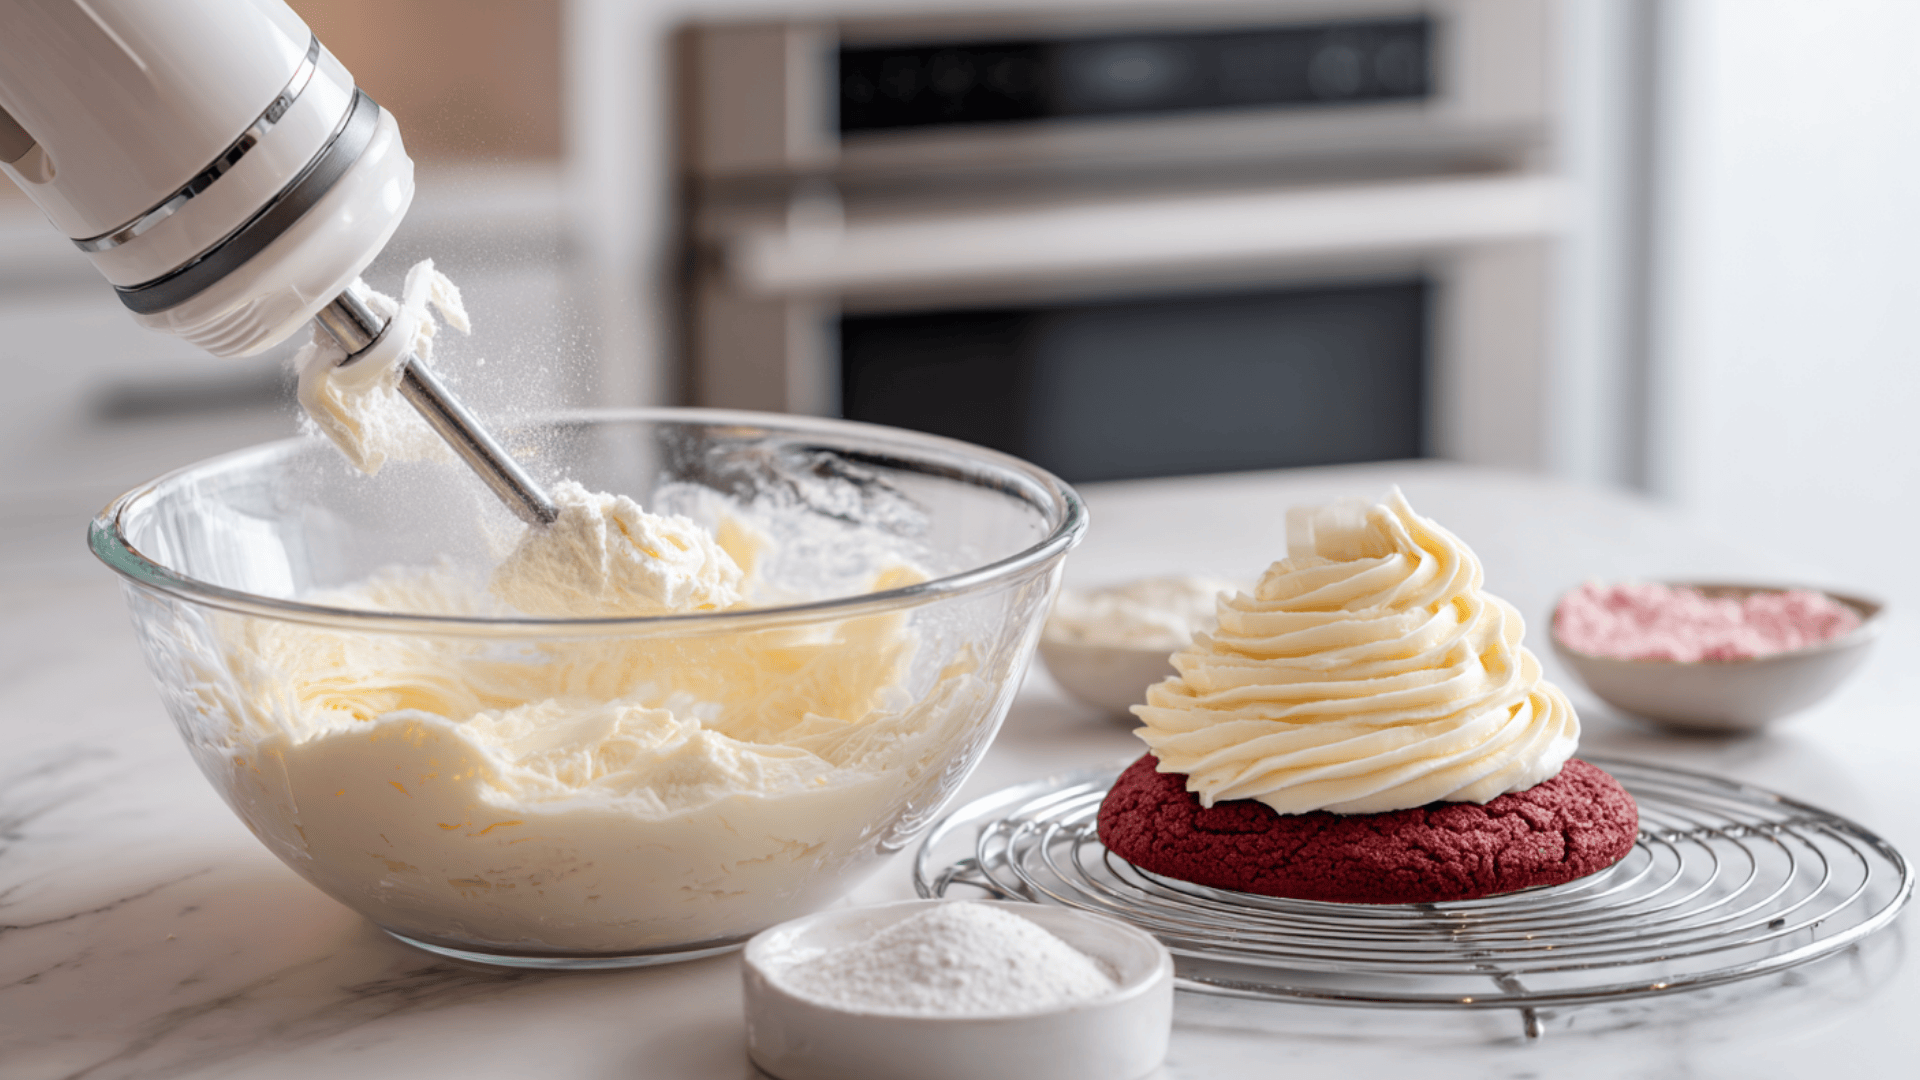
The perfect cream cheese frosting is smooth, holds its shape, and tastes amazing. Follow these simple steps to nail it every time.
Step 1: Start with softened cream cheese and butter at room temperature. This is important, cold ingredients create lumps.
Step 2: Beat the cream cheese and butter together until smooth and creamy. Scrape down the sides of the bowl to make sure everything is mixed evenly.
Step 3: Add the powdered sugar a little at a time. This prevents sugar clouds and keeps lumps from forming. Keep beating until fluffy.
Step 4: Mix in the vanilla extract and a tiny pinch of salt. The salt balances the sweetness and makes the frosting taste amazing.
Step 5: Check your consistency. If it’s too soft, pop the frosting in the fridge for 10-15 minutes to firm up. If it’s too thick, add 1 teaspoon of milk or cream and mix again.
Step 6: For that signature Crumbl swirl, put the frosting in a piping bag and pipe a spiral on top of each cookie. No piping bag? Use a zip-lock bag with the corner cut off, or spread it with a spatula in a swirl motion.
These red velvet cookies with cream cheese frosting are best enjoyed within a few hours of frosting for that fresh-from-the-bakery taste!
Nutrition Facts (Per Cookie with Frosting)
| Nutrient | Amount |
|---|---|
| Calories | 350-400 |
| Total Fat | 18g |
| Saturated Fat | 11g |
| Cholesterol | 75mg |
| Sodium | 320mg |
| Total Carbs | 48g |
| Sugar | 32g |
| Protein | 4g |
Note: Values are estimates and may vary based on portion size and ingredients used.
Pro Tips for Bakery-Style Results
These simple tips will help your cookies look and taste as they came straight from Crumbl. They make all the difference between good cookies and amazing ones.
- Always chill your dough: This is the number one secret to thick cookies
- Weigh your portions: A kitchen scale helps you get consistent sizes and even baking
- Underbake slightly: Pull cookies out when centers still look soft
- Cool completely before frosting: Patience pays off
- Don’t skip the salt: It boosts all the flavors in both the cookies and frosting
- Use room temperature ingredients: They mix together much smoothly
Follow these tips, and you’ll have bakery-worthy cookies every single time. Your friends and family won’t believe you made them at home!
Variations & Add-Ons
Once you master the basic recipe, you can get creative with fun variations. These simple twists let you customize your cookies and keep things exciting every time you bake.
Mini Version
Not everyone wants a giant cookie. For bite-sized treats, use smaller portions of about 45-55 grams each.
Reduce the baking time to 8-10 minutes. These mini cookies are perfect for parties, cookie platters, or when you want just a little sweet treat without the commitment.
Extra Cocoa
Love chocolate? Add an extra tablespoon of cocoa powder to the dough for a deeper, richer chocolate flavor.
This gives your cookies a more intense taste while still keeping that classic red velvet vibe. It’s a simple tweak that chocolate lovers will really appreciate.
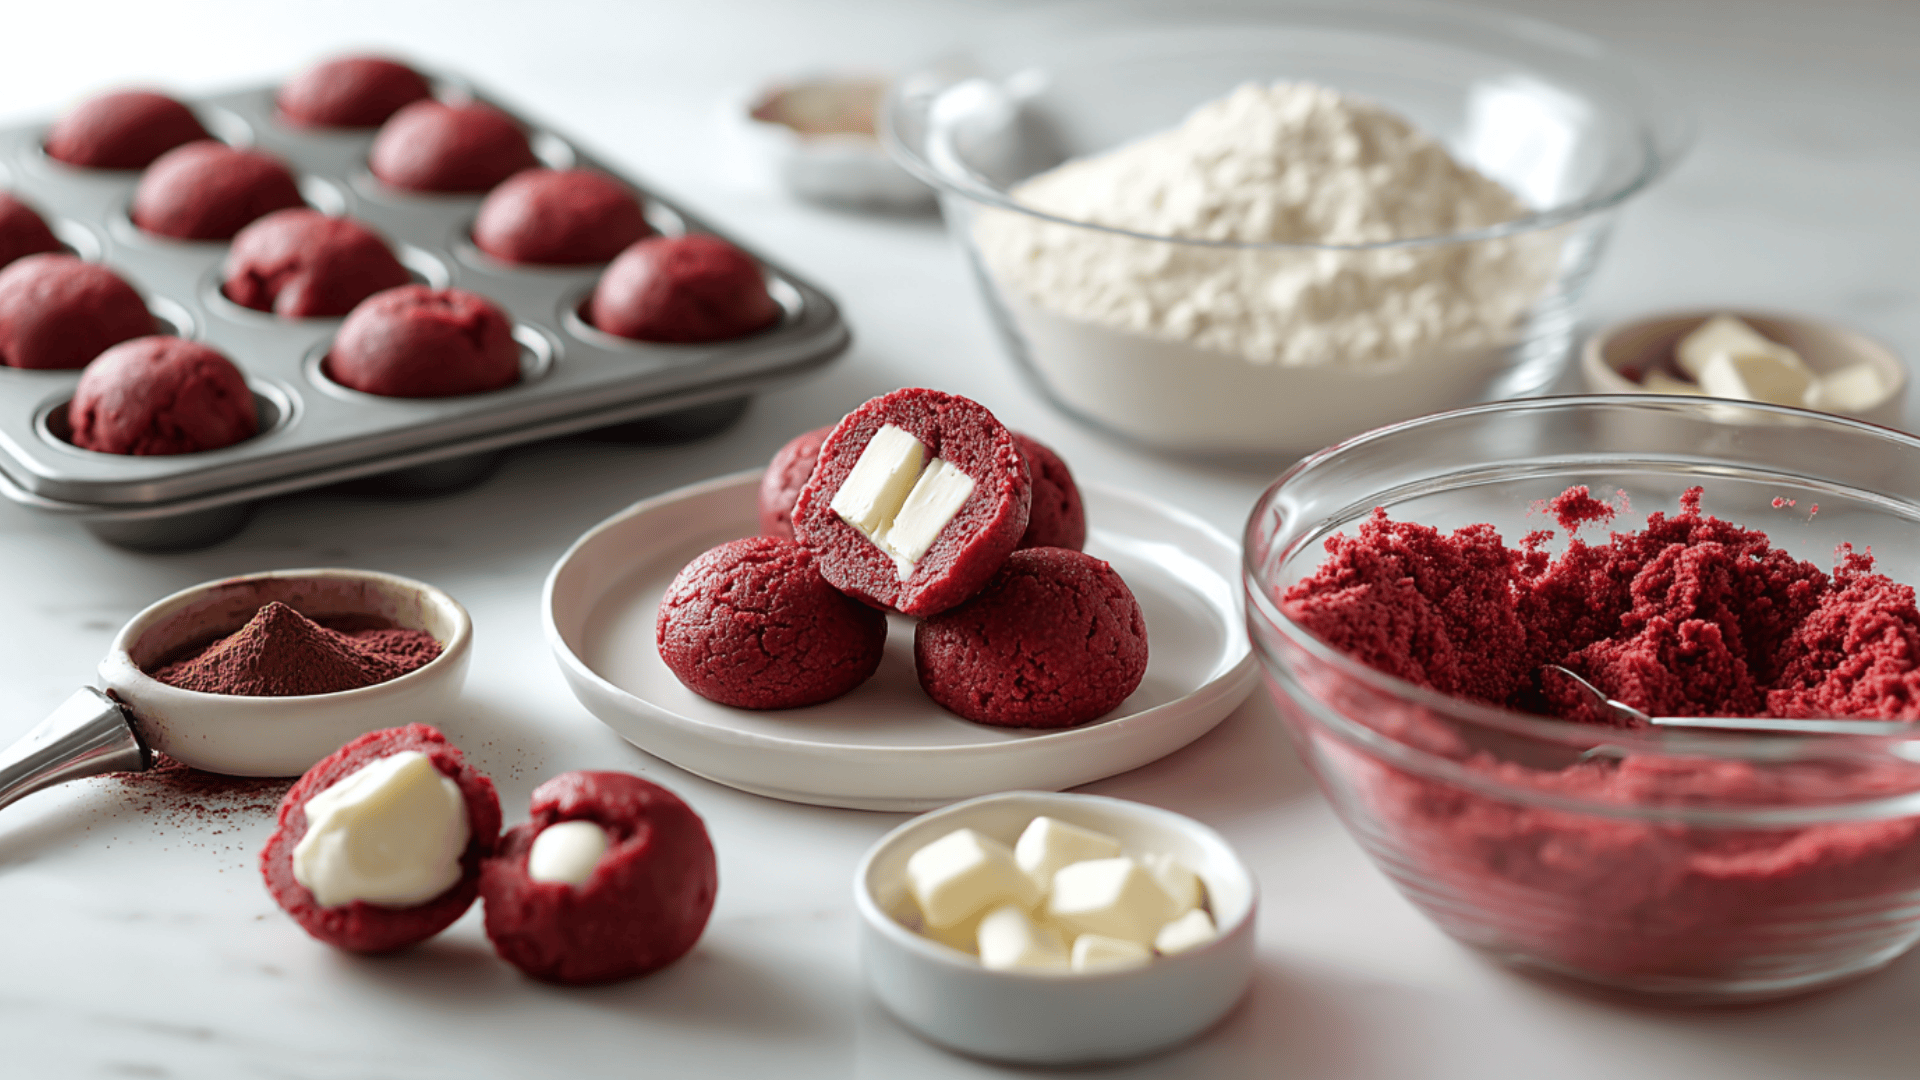
Stuffed Cookies
Take things up a notch by hiding a cream cheese surprise inside! Before baking, place a small cube of cold cream cheese in the center of each dough ball.
Wrap the dough around it completely. When baked, you get a gooey, tangy center that’s absolutely delicious.
White Chocolate Chips
For extra sweetness and texture, fold in about one cup of white chocolate chips into your dough.
The creamy white chocolate pairs beautifully with the red velvet flavor and adds little pockets of melty goodness throughout each cookie.
Gluten-Free Option
Need a gluten-free version? Swap the regular all-purpose flour for a 1:1 gluten-free baking flour. Most brands work great in this recipe.
Just make sure your other ingredients are also gluten-free, and you’ll have cookies everyone can enjoy.
Storage, Freezing & Make-Ahead Instructions
These cookies are perfect for planning. From prepping for a party to saving some for later, these tips will help you keep them fresh and delicious.
- Store frosted cookies in the fridge: Keep in an airtight container for up to 5 days.
- Bring to room temperature before eating: Remove from fridge 15-20 minutes before serving.
- Freeze unfrosted cookies: Cool completely, freeze in a single layer, then bag. Lasts up to 3 months.
- Freeze dough balls: Portion, freeze on a sheet, then bag. Best make-ahead option!
- Bake frozen dough directly: No thawing needed, add 2-3 extra minutes.
- Add frosting fresh: Always frost right before serving for the best taste.
With these storage tips, you can enjoy bakery-fresh red velvet cookies whenever the craving strikes. No more waiting, grab, bake, and enjoy!
Ready to Bake?
Now you have everything you need to make amazing red velvet Crumbl cookies at home! These thick, soft, bakery-style treats are perfect for holidays, birthday parties, or just a cozy weekend baking session.
Once you try this recipe, you might never go back to buying cookies again.
The best part? You can make the dough ahead and freeze it. That means fresh, warm cookies whenever the craving hits!
We’d love to hear how your cookies turned out. Did they come out thick and soft? Was the frosting as dreamy as you hoped? Leave a rating and drop a comment below to share your experience.
And if you snap a picture of your beautiful creations, tag us on social media. We love seeing your bakes!