


Ever get hit with a sudden sweet craving that just won’t quit? Especially at night when you want something cozy but don’t want to make a mess in the kitchen.
That’s when this single-serving apple crisp becomes the perfect solution. It’s warm, full of cinnamon flavor, and comes together in just a few minutes with ingredients you likely already have at home.
No need to heat the oven or bake a full batch – just one bowl, one spoon, and pure satisfaction. If you’re curled up with a book or winding down after a long day, this quick apple crisp feels like comfort in a cup.
It’s the kind of treat that hits the spot every time, and once you try it, you’ll find yourself coming back to this simple recipe again and again.
Ingredients You’ll NeedFor the Apple Base:
For the Crisp Topping:
|
Recipe Notes
| Recipe Notes | Information |
|---|---|
| Prep Time | 5 minutes |
| Cook Time | 2–3 minutes |
| Category | Dessert / Single-Serve |
| Method | Microwave |
| Cuisine | American |
| Yield | 1 serving |
How I Make This Crisp (Step-by-Step Recipe)
When craving something sweet but don’t want the fuss of baking a whole dessert, this easy apple crisp is my go-to. It’s quick, cozy, and made in just minutes.
Let me show you exactly how to make it step by step.
1. Prep the Apple
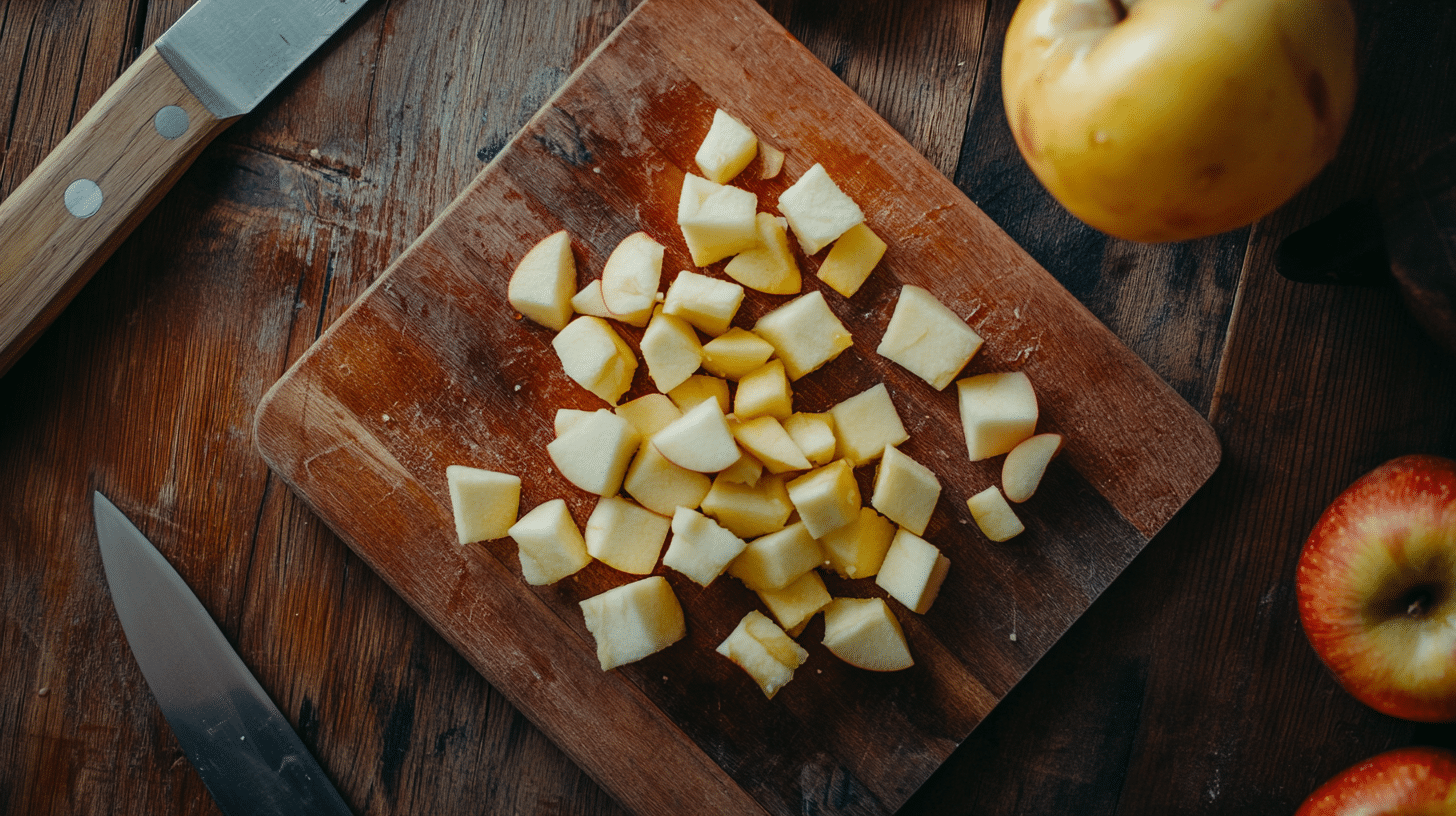
Start by peeling and chopping a medium apple into small cubes. Smaller pieces help them cook evenly and soften quickly in the microwave, making the process smoother and more enjoyable.
Pro Tip: If you’re short on time, skip peeling the apple, give it a good wash, and dice it up with the skin on for extra fiber.
2. Mix the Filling
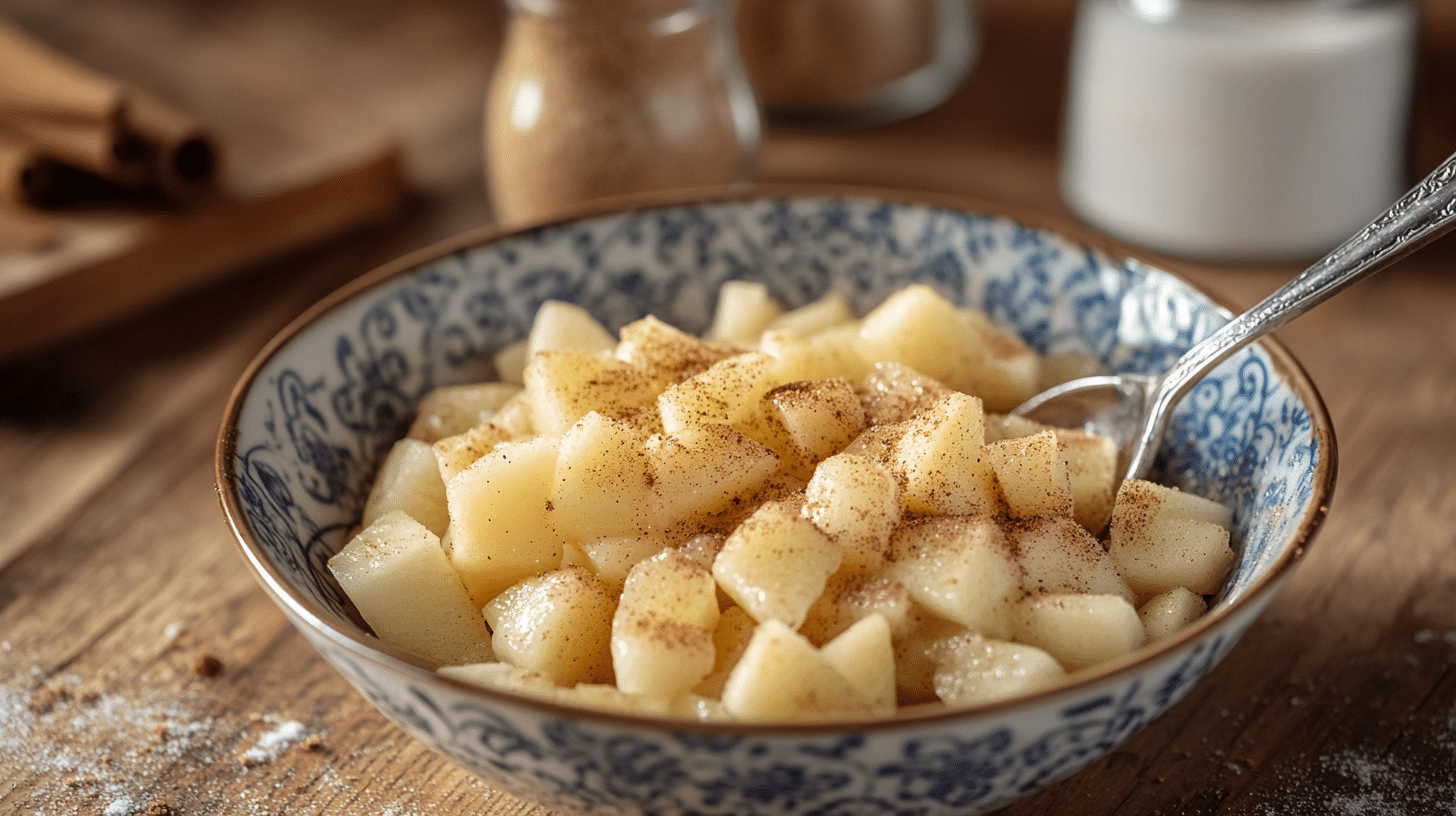
In a small bowl, gently toss the diced apples with a touch of granulated sugar and a pinch of cinnamon. Mix everything well until the apple pieces are evenly coated and fill your space with a warm, inviting aroma.
Pro Tip: Add a splash of lemon juice to brighten the flavor or prevent the apples from browning.
3. Prepare the Topping
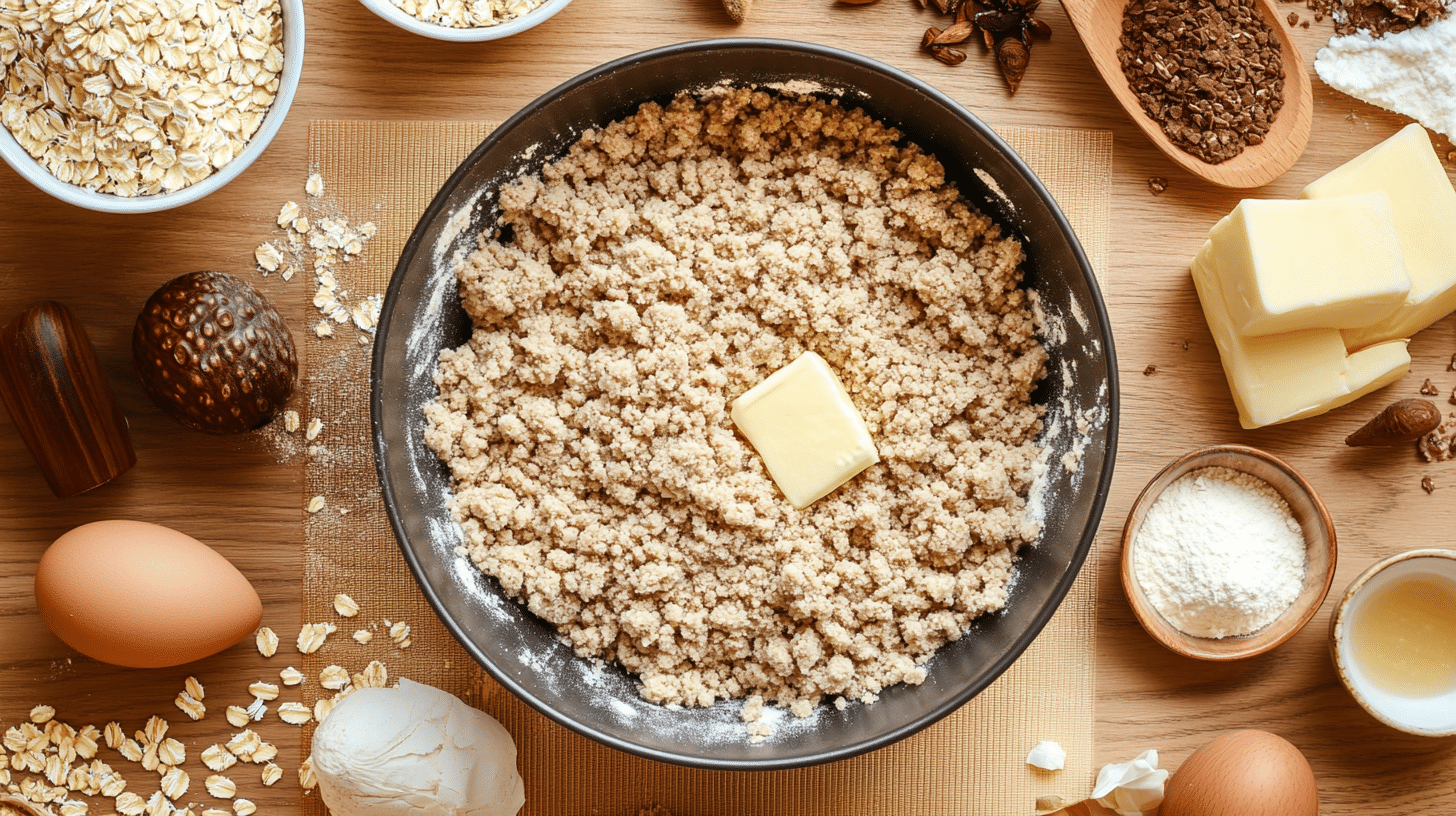
In a separate bowl, gently combine the flour, rolled oats, brown sugar, and just a tiny pinch of salt. Then, add a tablespoon of softened butter and use your fingers to work it in until the mixture becomes delightfully crumbly and golden.
Pro Tip: For an extra crunch, add some chopped nuts or sprinkle with granola.
4. Assemble the Crisp
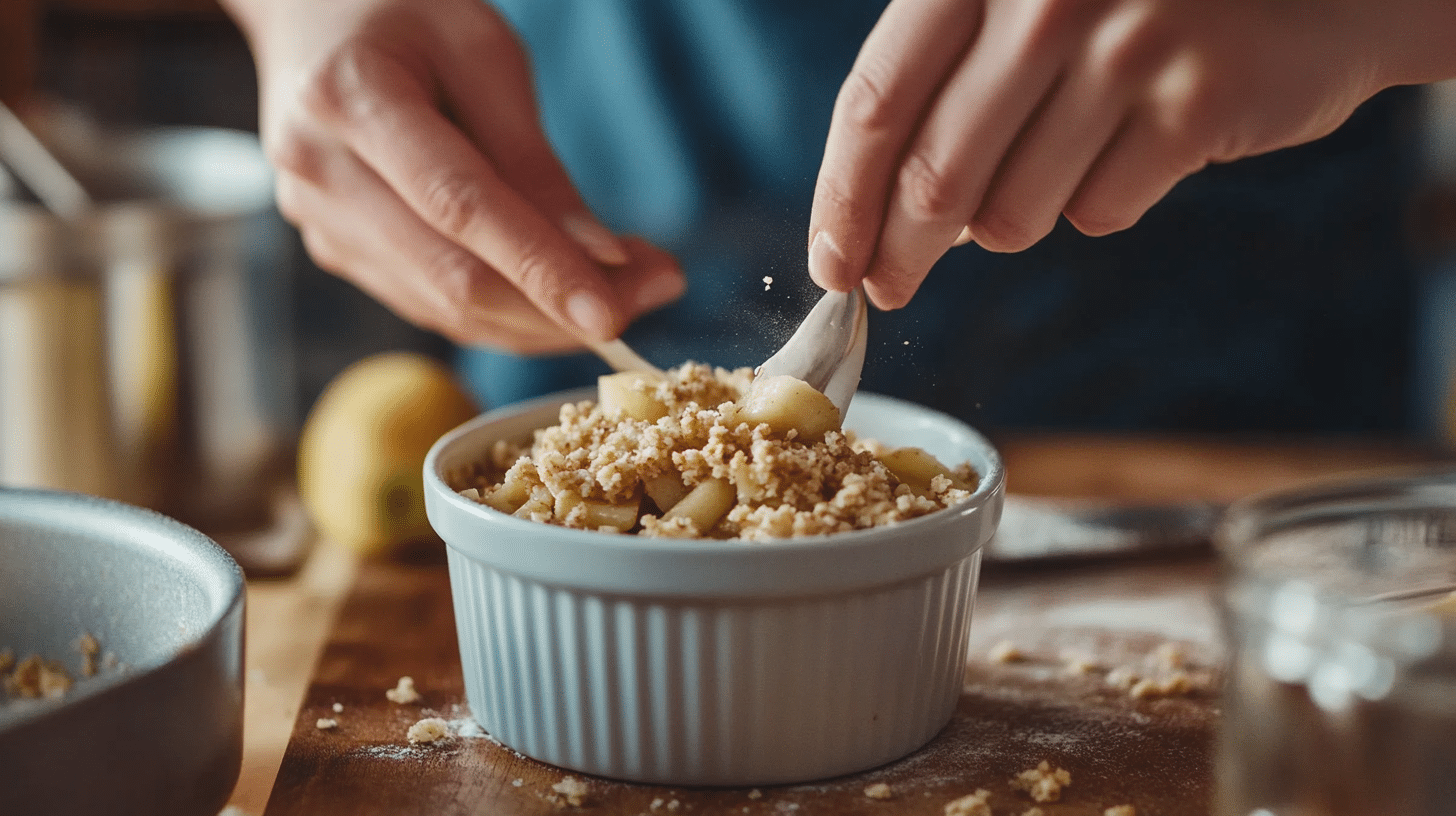
Gently scoop the apple mixture into a microwave-safe ramekin or mug, it’s like giving your apples a cozy bed!
Then, lovingly sprinkle the oat topping all over the apples, making sure they are completely covered for that lovely, crispy top you’re aiming for.
Pro Tip: Gently press the topping down with a spoon to help it stick better and crisp up nicely.
5. Microwave to Cook

Pop the mug in the microwave and cook it on high for 2-3 minutes. When the apples are tender and the topping looks bubbly and slightly crisp, it’s ready.
Pro Tip: Microwave power varies; start with 2 minutes and add more in 10-second bursts if needed.
6. Cool and Enjoy
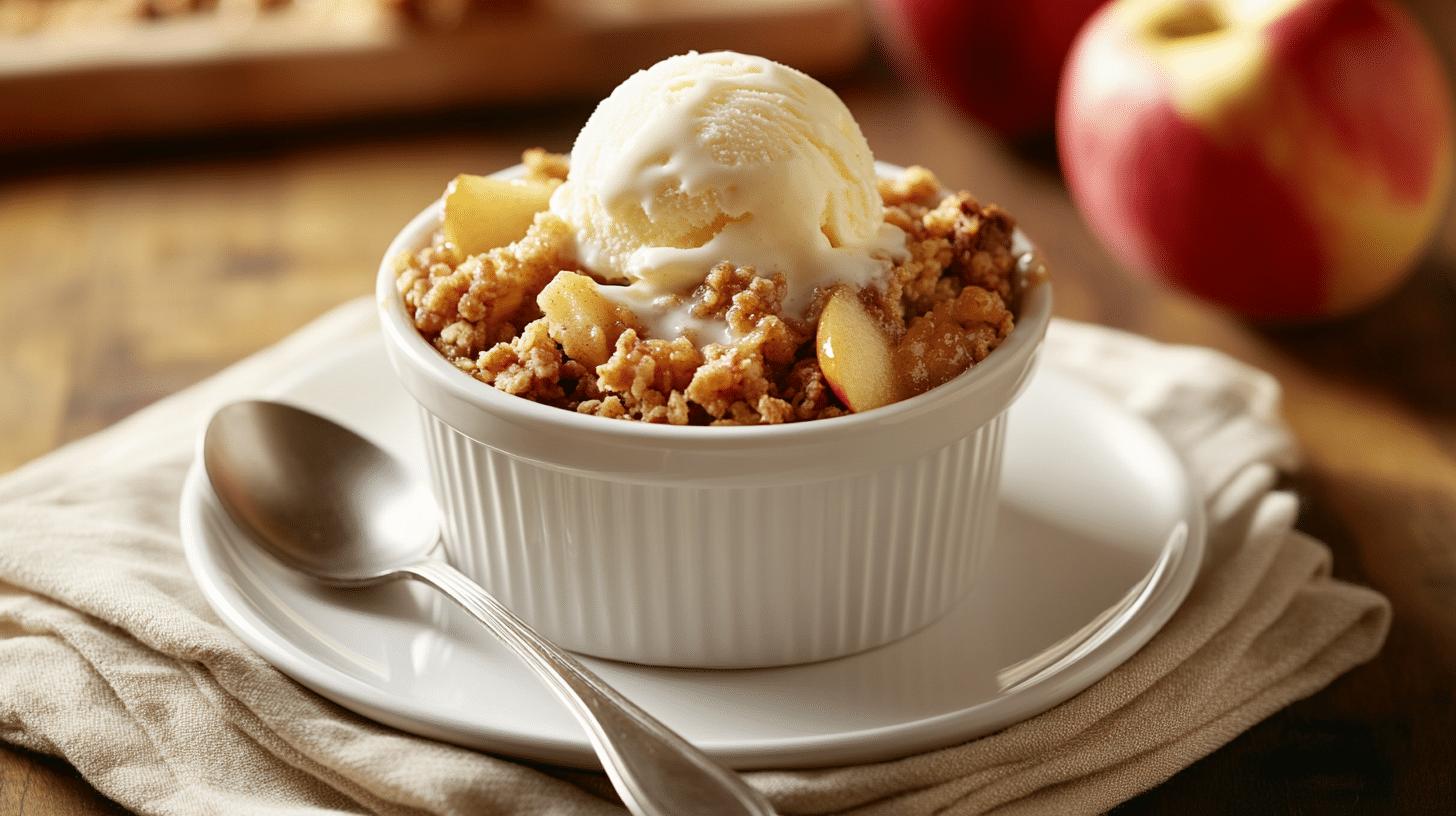
Allow the crisp to sit for about a minute to avoid burning your mouth. Then, enjoy! You might want to treat yourself with a scoop of vanilla ice cream or a small dollop of whipped cream for an extra special touch.
Pro Tip: Want to level up? Sprinkle a dash of cinnamon or drizzle a little caramel sauce over the top before serving.
Nutritional Facts
| Nutritional Facts | Per Serving (1 ramekin) |
|---|---|
| Calories | 230–250 kcal |
| Total Fat | 9g |
| Saturated Fat | 5g |
| Carbohydrates | 38g |
| Sugar | 24g |
| Dietary Fiber | 3g |
| Protein | 2g |
| Sodium | 60mg |
| Cholesterol | 20mg |
| Calcium | 2% DV |
| Iron | 6% DV |
Note: These values are estimates based on standard ingredients and may vary depending on the exact brands and quantities used.
Variations to Try
One of the reasons this single-serving apple crisp is so appealing is that it’s incredibly easy to customize. Depending on what’s in your kitchen or the mood you’re in, there are endless ways to play around with different ingredients.
Here are some favorite variations that always keep things exciting:
Fruit Swaps: While apples are classic, this crisp works well with pears, peaches, and mixed berries. Pears add softness, peaches bring juiciness, and berries make it tangy and vibrant. Honestly, it’s hard to go wrong!
Nutty Additions: Adding chopped walnuts or pecans to the topping creates a satisfying crunch that contrasts beautifully with the soft, warm fruit below. It’s perfect for A more indulgent treat without overdoing it.
Spice It Up: To deepen the flavor, try sprinkling in a dash of nutmeg or allspice along with the cinnamon. Just a tiny pinch does the trick; It adds a cozy, warm spice that makes the crisp feel even more comforting.
Healthier Options: For a lighter or dairy-free version, swap butter for coconut oil and maple syrup for sugar. The result? A vegan-friendly dessert that’s just as delicious and hits that sweet spot.
Storage and Reheating Tips
Leftovers don’t happen often with this apple crisp, but on the rare occasion there’s some left (usually because dessert was already enjoyed before dinner!), pop the rest into the fridge.
Cover the mug or ramekin with plastic wrap or transfer it to a small, airtight container, and it will keep well for up to two days.
When you’re ready for round two, microwave it for about 30 seconds, just until it’s warm and gooey again.
If you have a little extra time, you might even add a fresh sprinkle of oats on top before reheating to keep the texture crisp. It’s just as comforting the second time around, sometimes even better!
To Sum Up
This little apple crisp has really become my go-to for satisfying that sweet tooth. It’s quick, comforting, and just the right size when you’re not in the mood to make a whole batch of anything.
If you’re relaxing, catching up on a show, or simply winding down at the end of the day, this little treat always feels just perfect to enjoy.
What makes it truly special is how effortlessly it adapts to what you love.
After giving it a try once, you’ll probably find yourself adding little extras like a handful of chocolate chips, a splash of caramel, or maybe a different fruit mix to make it just right for you.
Give it a try the next time you’re craving something sweet but want to keep things simple. And if you decide to put your own twist on it, I’d love to hear how you made it uniquely yours!