Looking for an incredible bourekas recipe that will fill your kitchen with delicious smells?
You’ve come to the right place! These flaky, cheesy pastries from the Middle East are easier to make than you might think.
If you’re new to baking or already a seasoned cook, this bourekas recipe will help you create golden, crispy treats that everyone will enjoy.
From the buttery dough to the creamy cheese filling, every bite is pure comfort food.
Get ready to impress your family and friends with homemade bourekas that taste just like the ones from your favorite bakery. Let’s start baking together!
The Cultural Story Behind Bourekas You Should Know
Bourekas have an interesting history that spans centuries and continents. These flaky pastries originated in the Ottoman Empire, where they were enjoyed by people from diverse cultures.
When Sephardic Jews lived in the Ottoman territories, they adopted this delicious recipe and made it their own.
In the early 1900s, many Sephardic families left the Balkans and moved to Israel, bringing their beloved bourekas recipes with them. Over time, bourekas gained immense popularity throughout Israeli society.
Today, you can find them in nearly every Israeli bakery, from small neighborhood shops to large commercial bakeries. They’ve become an important part of Israeli food culture.
Bourekas in Food & Culture: From Street Snack to Trendy Icon
Bourekas are becoming more popular than ever before. What started as a traditional pastry is now making headlines in food magazines and appearing on restaurant menus across America.
- Growing Popularity: Bourekas are quickly gaining fans across major U.S. cities like Los Angeles and New York.
- Comfort Food: Known for their flaky crust and cheesy filling, bourekas offer a warm, satisfying snack.
- Chef Favorites: Top American chefs are adding bourekas to their menus, spotlighting this classic pastry.
- Media Spotlight: Food magazines and TV shows are featuring bourekas, boosting their mainstream appeal.
- Creative Flavors: Bakeries blend traditional cheese bourekas with local ingredients for fresh twists.
This growing popularity demonstrates how food can transcend cultures and find new homes. Bourekas are proving that delicious, simple comfort food never goes out of style.
Ingredients You’ll NeedDry Ingredients
Wet Ingredients
Cheese Filling Options
|
Step-by-Step Instructions for Bourekas Recipe
Making bourekas at home is easier than you might think! Follow these simple steps to create flaky, cheesy pastries that everyone will love.
From preparing the dough to baking the perfect golden bourekas, this recipe will guide you through the process with easy-to-follow instructions.
Step 1: Prepare the Dough

Start by mixing flour, salt, and baking powder in a large bowl. Add oil, yogurt, and eggs to the dry ingredients. Mix everything together slowly, then knead the dough gently until it becomes soft and smooth.
Let the dough rest for 30 minutes covered with a clean kitchen towel. This resting time makes rolling much easier.
Pro Tip: If your dough feels too sticky, add a little more flour while kneading.
Step 2: Make the Cheese Filling
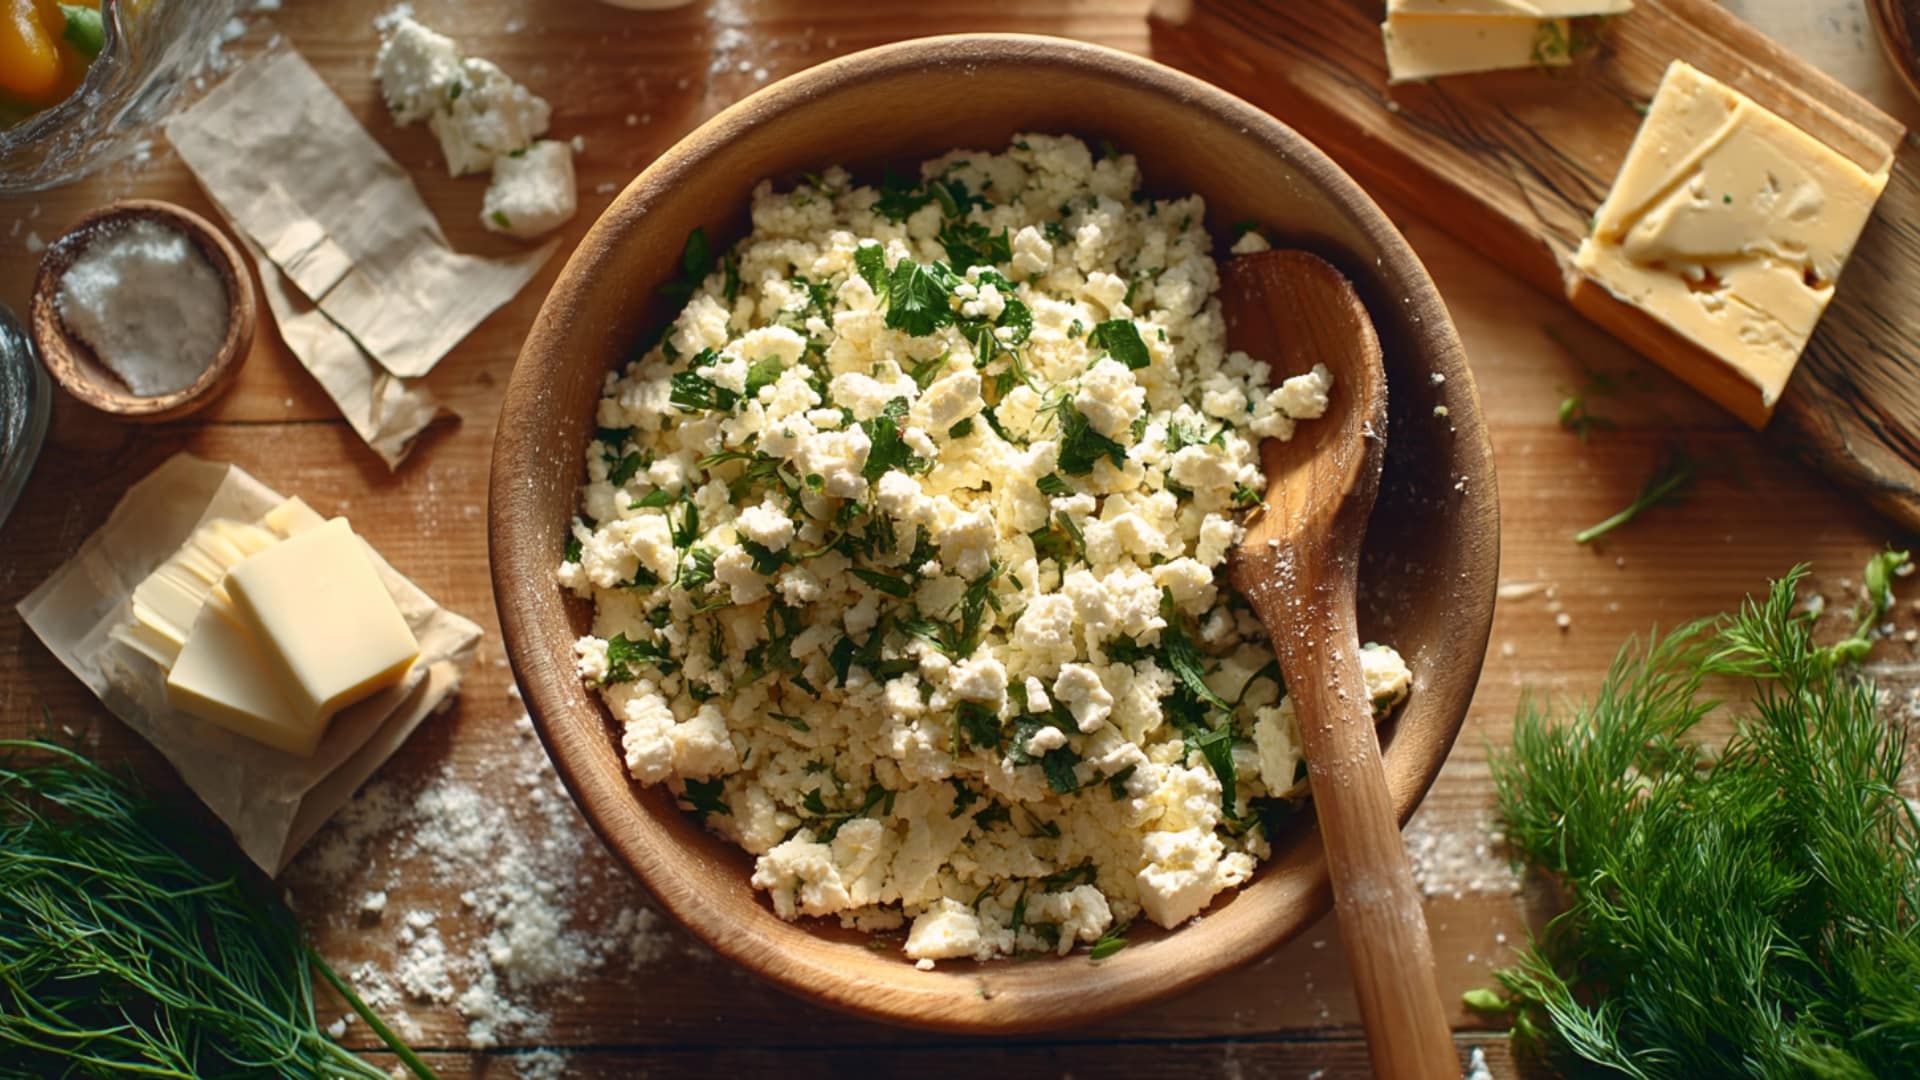
While your dough rests, prepare the filling by mixing your favorite cheeses in a bowl. Feta and mozzarella create a delicious combination that melts beautifully.
Add chopped fresh herbs, such as parsley or dill, for an extra burst of flavor. Mix everything well so the filling is evenly combined and ready to use when needed.
Pro Tip: Drain wet cheeses, such as ricotta, on paper towels to prevent soggy bourekas.
Step 3: Assemble the Bourekas
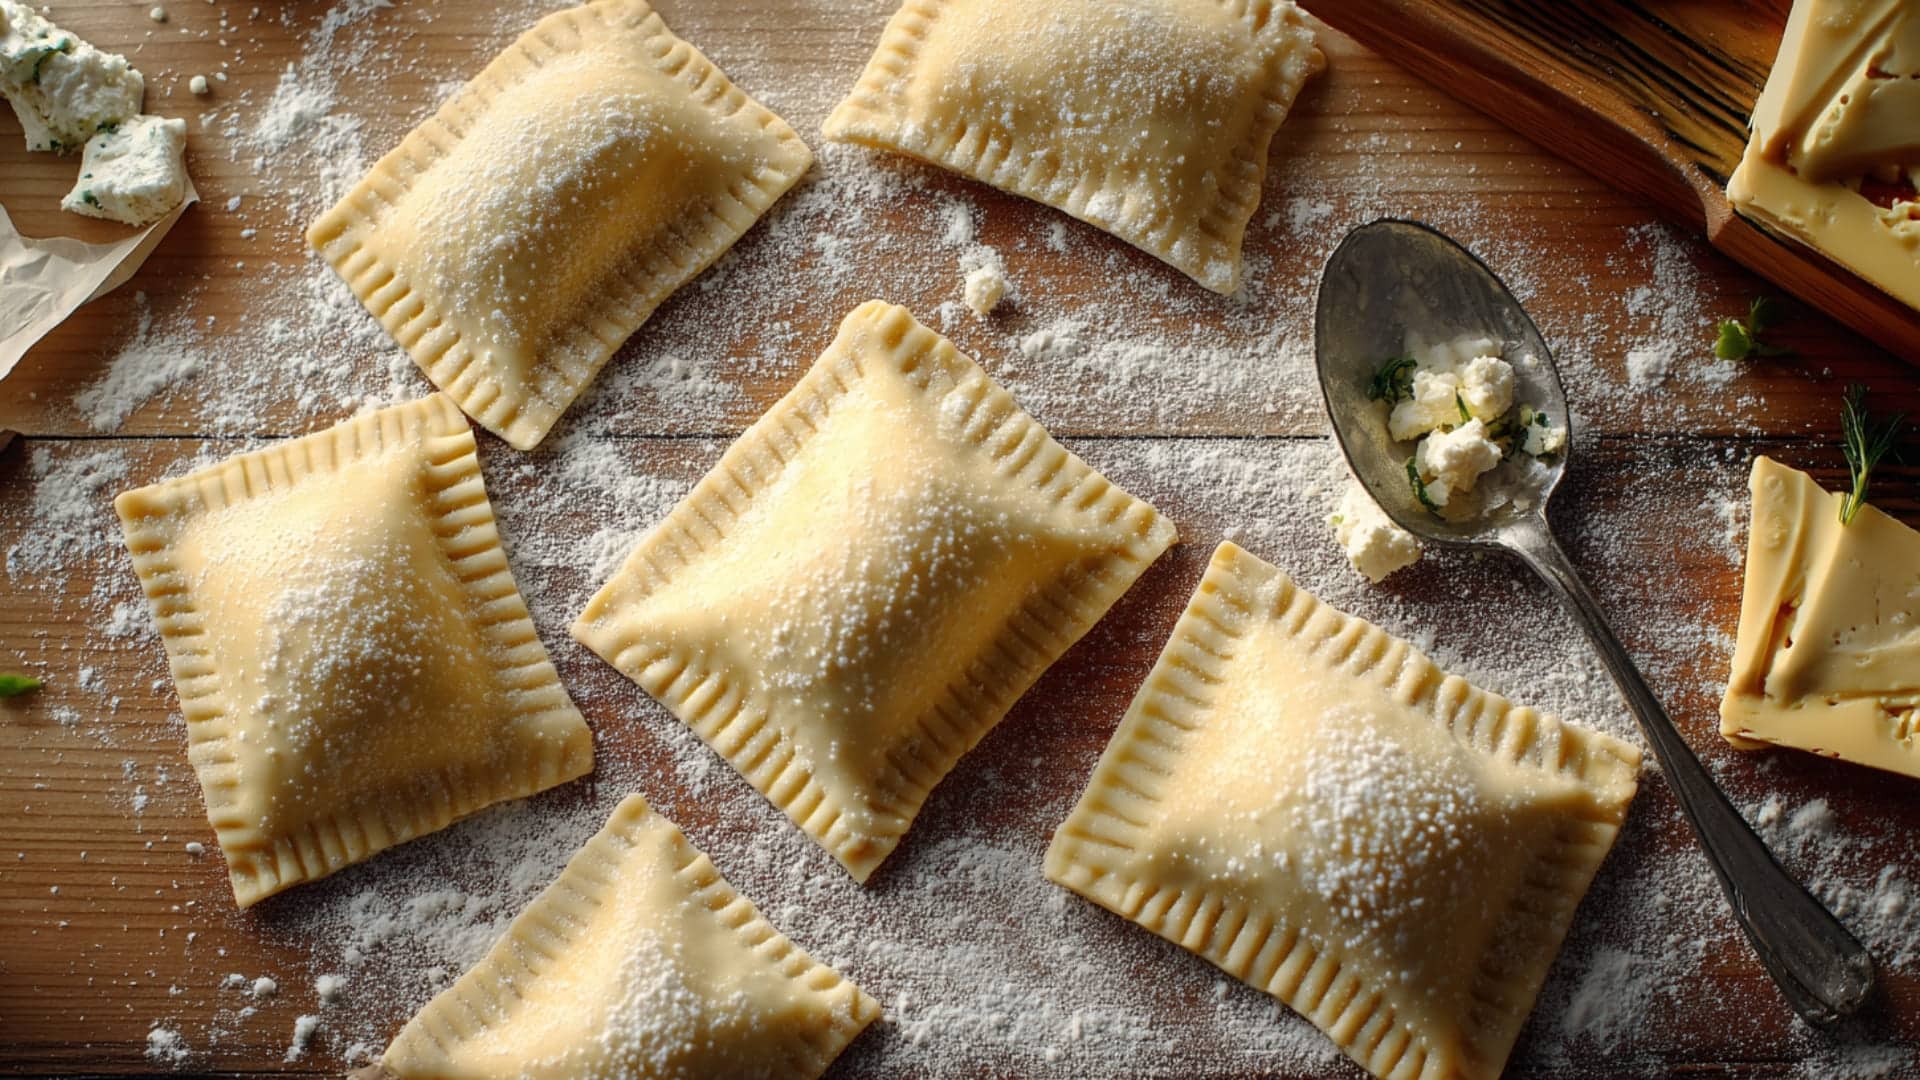
Roll the rested dough into thin circles or squares on a floured surface. Place one spoonful of cheese filling in the center of each piece. Fold the dough over to create triangles or rectangles.
Press the edges firmly with a fork to seal completely and prevent filling from leaking out during baking.
Pro Tip: Don’t overfill your bourekas, as they may burst open during baking.
Step 4: Bake to Golden Perfection
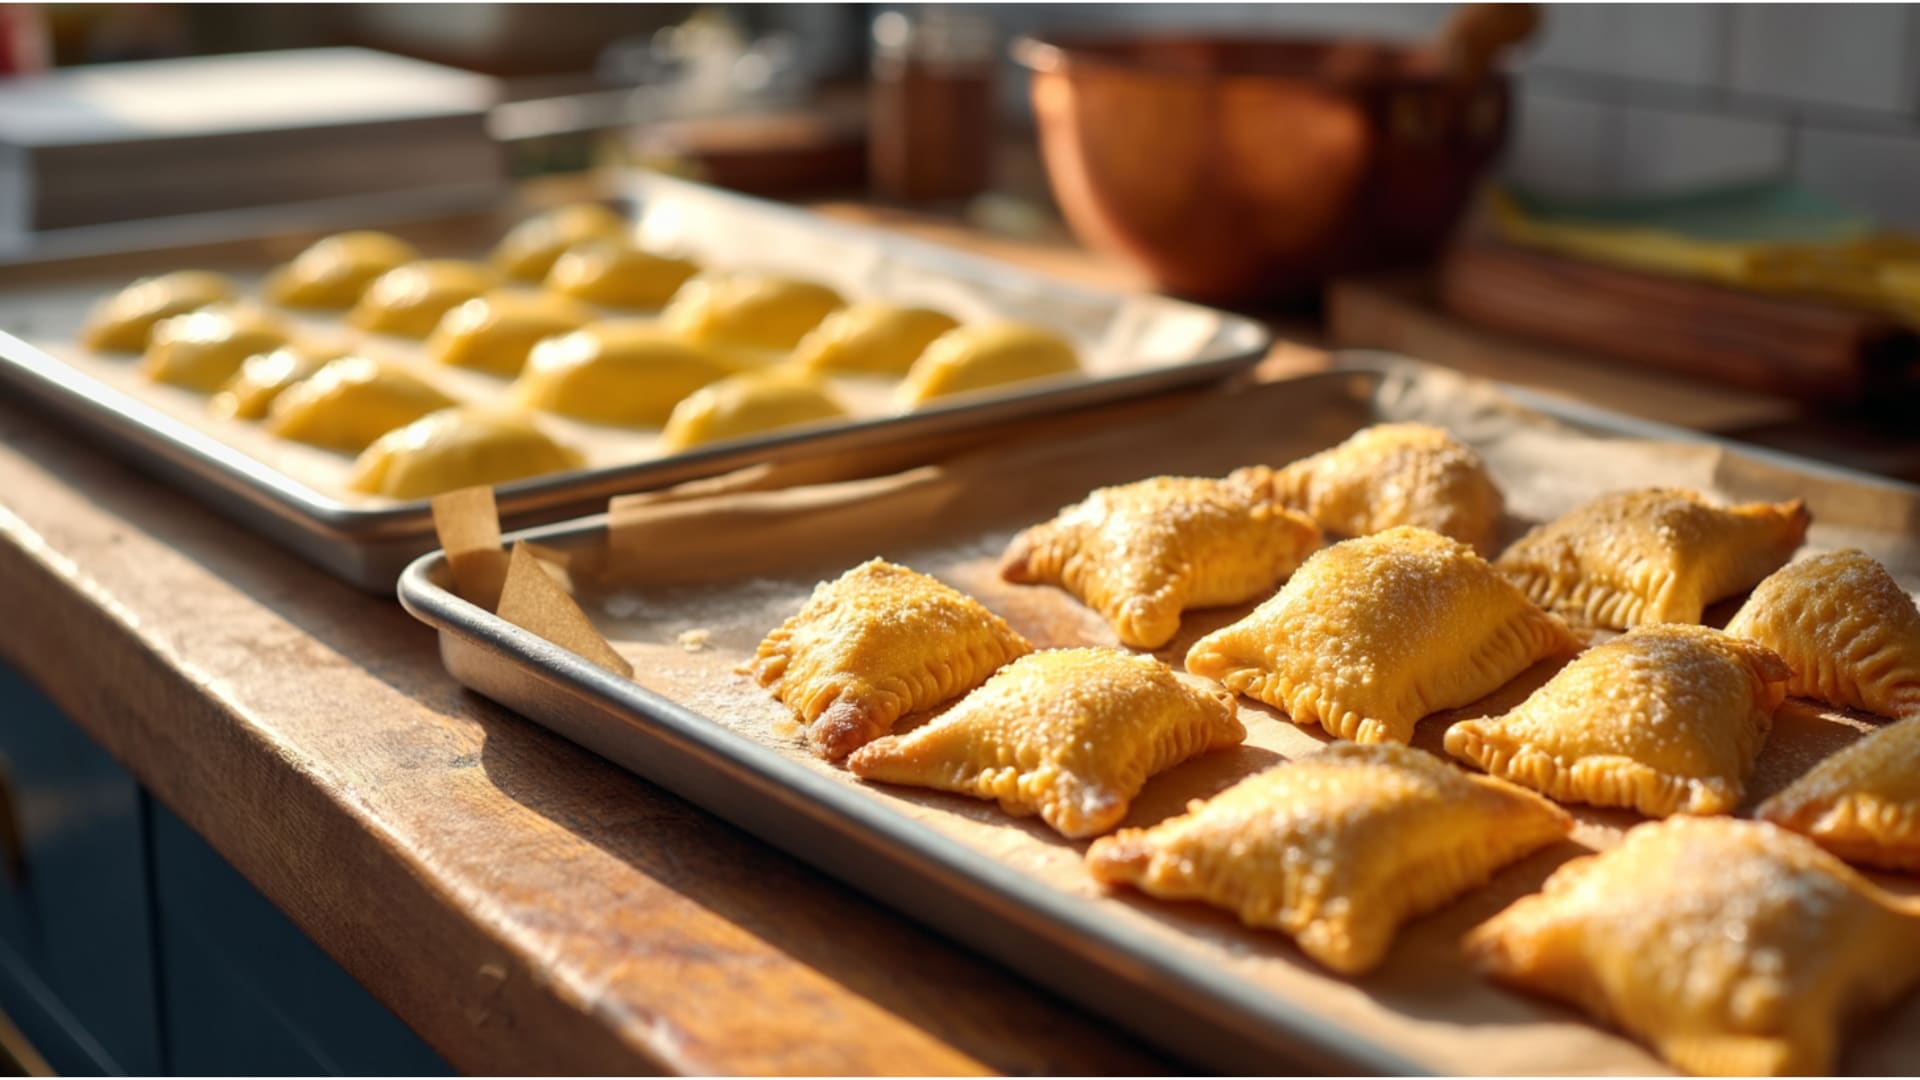
Place assembled bourekas on a parchment-lined baking sheet, leaving space between each one.
Brush the tops with oil or beaten egg for a beautiful golden color. Bake at 375°F for 20-25 minutes until they turn crispy and golden brown. Let them cool for five minutes before serving hot and fresh.
Pro Tip: Rotate your baking sheet halfway through cooking for even browning on all sides.
Recipe Notes
Here’s everything you need to know about making these delicious cheese bourekas. This recipe is ideal for beginners or home cooks seeking comforting, flaky, and flavorful food without hours in the kitchen.
| INFORMATION | DETAILS |
|---|---|
| Prep Time | 20 minutes |
| Bake Time | 20-25 minutes |
| Total Time | 40-45 minutes |
| Method | Oven-baked |
| Yield | 12-14 bourekas |
| Cuisine | Middle Eastern/Israeli |
| Difficulty | Easy |
With just 20 minutes of prep, you’ll have hot, cheesy bourekas ready in under an hour. If you’re making them for brunch, a snack, or a holiday spread, they’re sure to impress with their flaky crust and creamy filling!
Perfect Pairings: What to Enjoy with Your Bourekas
Bourekas are delicious on their own, but they become even more amazing when paired with the right foods and drinks. The key is choosing items that complement the rich, flaky pastry without overpowering it.
Here are some perfect combinations to make your bourekas experience truly special.
1. Tasty Dips to Serve
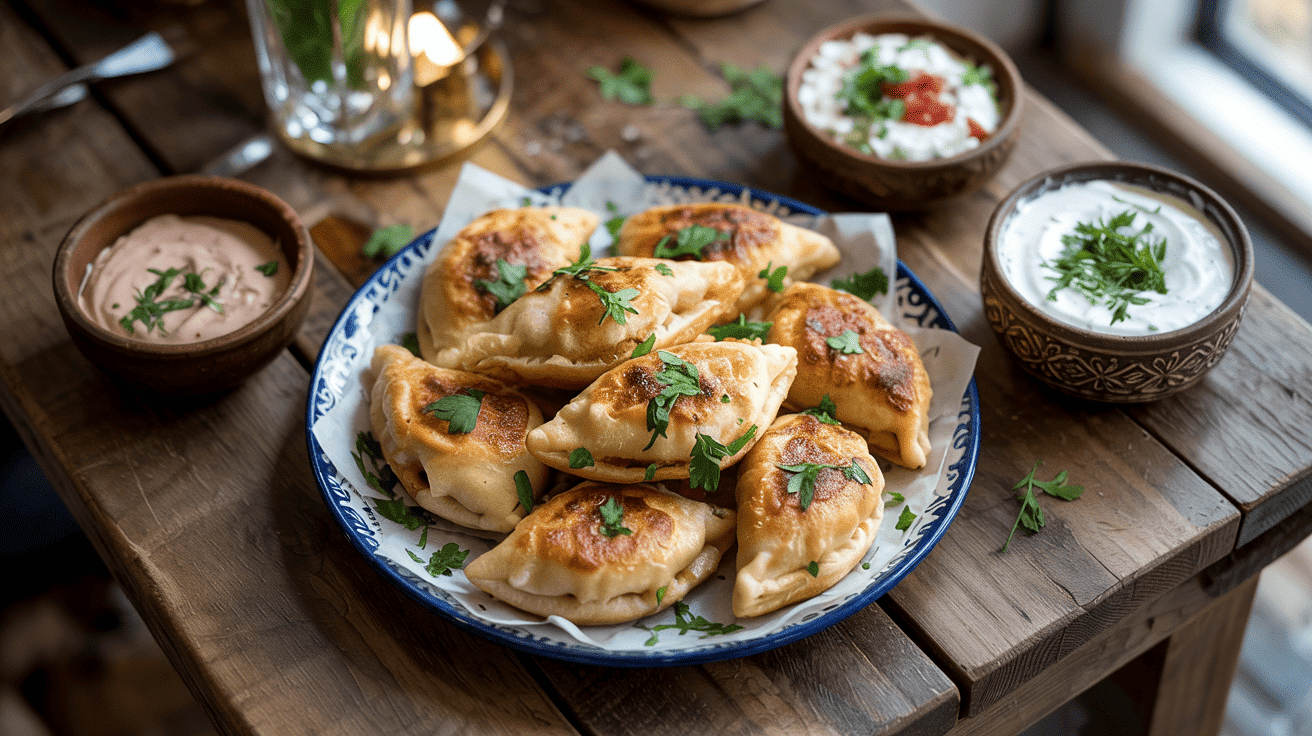
Bourekas taste incredible when paired with creamy or tangy dips that enhance their flavor. Try serving them with smooth tahini sauce, fresh yogurt mixed with garlic and herbs, or classic sour cream.
These dips perfectly complement the rich cheese filling, adding an extra layer of flavor to every bite. Serve your chosen dips in small bowls for easy sharing.
2. Drinks That Go Well

The perfect drink can make your bourekas experience even better and more enjoyable. Hot Israeli mint tea or strong black coffee works wonderfully because they cut through the pastry’s richness.
For cooler weather, try these warm options. When it’s hot outside, choose sparkling water with lemon or cold ayran, a refreshing yogurt drink that pairs beautifully.
3. Easy Sides to Add
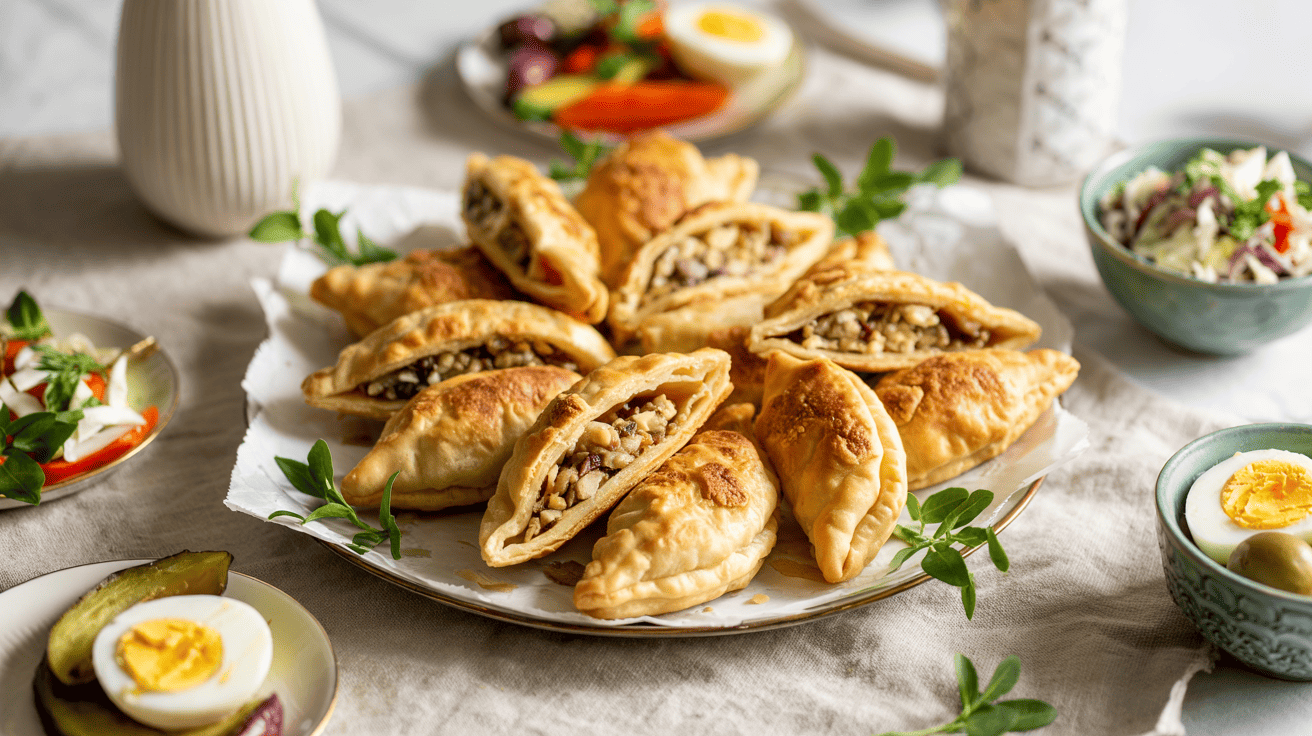
Simple sides can turn your bourekas into a complete, satisfying meal for any time of day. Fresh chopped salad, crunchy pickles, or salty olives add a nice contrast to the rich pastry.
A hard-boiled egg or colorful roasted vegetables also work perfectly. These sides are quick to prepare and make your plate look colorful, balanced, and totally delicious.
Nutrition Facts
These cheese bourekas combine crispy pastry and creamy filling. Despite feeling indulgent, each is a balanced snack or light meal. Here’s a quick nutrition breakdown per serving:
| NUTRIENT | PER BOUREKA (1 Serving) |
|---|---|
| Calories | 240 kcal |
| Protein | 6 g |
| Carbs | 22 g |
| Fat | 14 g |
| Fiber | 1 g |
| Sugar | 2 g |
| Sodium | 280 mg |
Note: Nutrition values are estimates based on 12 bourekas made with puff pastry, feta, mozzarella, and egg wash. Actual values may vary depending on the size and specific ingredients used.
Tips for Making Perfect Bourekas Every Time
Making bourekas might seem tricky at first, but with the right tips, you can create perfect pastries every time. These simple tricks will help you avoid common mistakes and get amazing results.
- Let the dough rest for 30 minutes before rolling to prevent tearing.
- Handle the dough gently when mixing to maintain a light and flaky texture.
- Brush tops with beaten egg or oil for golden color and crispy crust.
- Bake at exactly 375°F for 20-25 minutes, checking at 20 minutes.
- Cool for 5 minutes after baking so the filling sets and won’t spill.
With these helpful tips in mind, you’ll be able to make bakery-quality bourekas in your own kitchen. Remember that practice makes perfect, so don’t worry if your first batch isn’t exactly right.
Final Thoughts
Now you have everything you need to make this wonderful bourekas recipe at home! These flaky pastries are perfect for breakfast, snacks, or anytime you crave something warm and cheesy.
Don’t be afraid to try different fillings or add your own special touches. Remember, the best part about cooking is making it your own. We’d love to hear how your bourekas turned out!
Please leave a comment below and share your baking experience with us. Did you try any fun variations? Share your tips and photos with other readers who want to try this delicious recipe too!