


Store-bought dumpling wrappers often fail to deliver the texture and flexibility that home cooks need for perfect dumplings.
I developed this hot water dough recipe to create supple, chewy wrappers that hold fillings beautifully without tearing.
Just three simple ingredients yield results far superior to anything you can buy.
Fresh wrappers have better stretch and flavor than commercial versions, plus they freeze perfectly for future dumpling sessions.
This recipe proves that making wrappers from scratch takes just minutes but elevates every dumpling you create.
Ingredients You’ll NeedFor the Wrappers:
|
Pro Tip: Use water that’s hot but not boiling for best results. Water around 80-90°C creates the perfect gluten development for flexible wrappers.
Recipe Information
| Information | Details |
|---|---|
| Prep Time | 20 minutes |
| Rest Time | 30 minutes |
| Rolling Time | 15 minutes |
| Total Time | 1 hour 5 minutes |
| Category | Base Recipe |
| Method | Hand-kneaded |
| Cuisine | Asian |
| Yield | 32 wrappers |
Let’s Create These Fresh Wrappers – Step by Step!
I’ve found this dumpling wrapper recipe works best with careful attention to water temperature and resting time for optimal texture development.
1. Combine Dry Ingredients
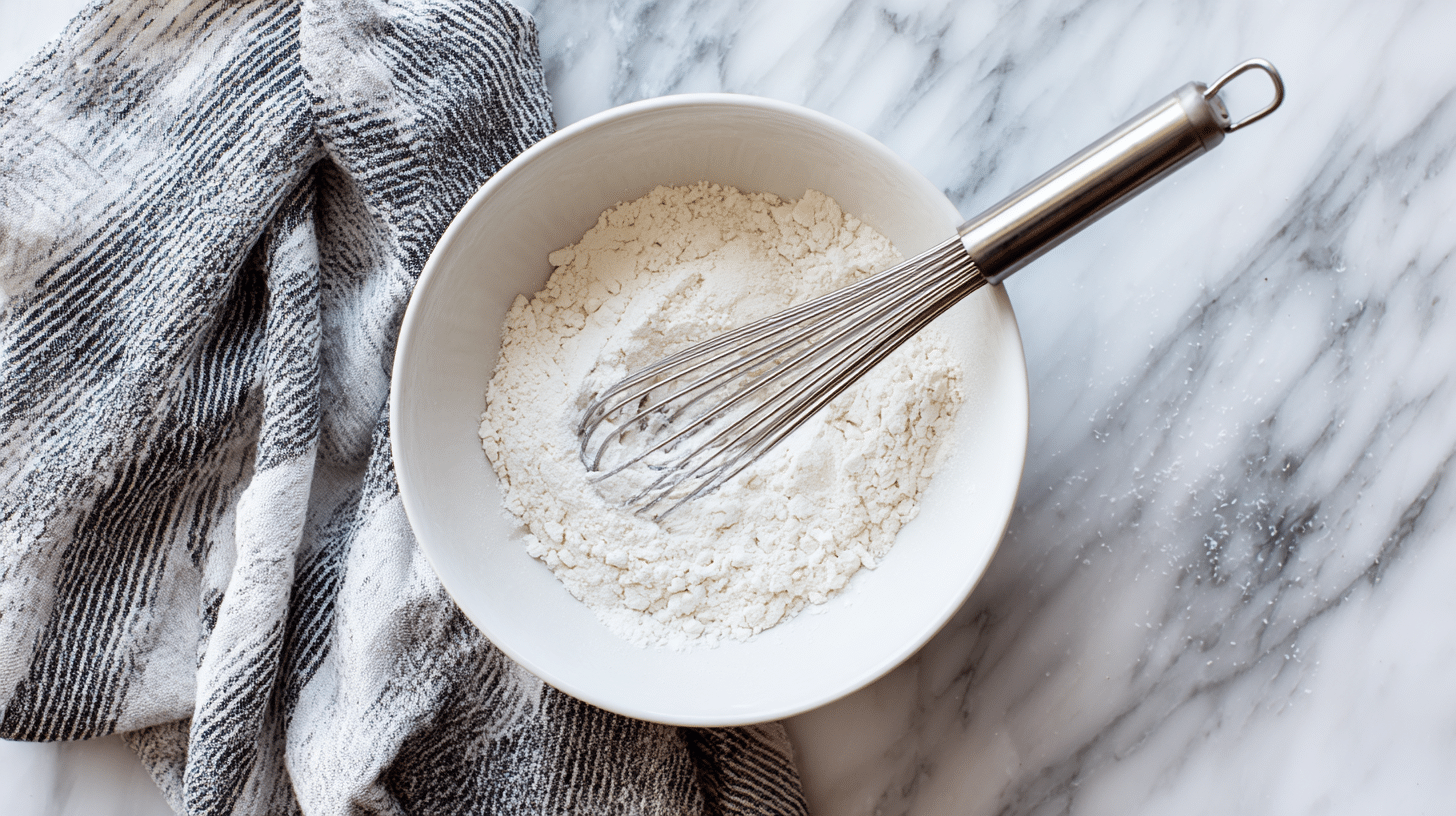
In a large bowl, combine flour and salt. Mix well to distribute salt evenly throughout the flour.
Even salt distribution prevents uneven texture in the finished wrappers. This step ensures consistent flavor and structure in every wrapper you make.
Pro Tip: Sift the flour first if you want extra-smooth wrappers. This removes any lumps and creates more uniform texture throughout the dough.
2. Add Hot Water Gradually
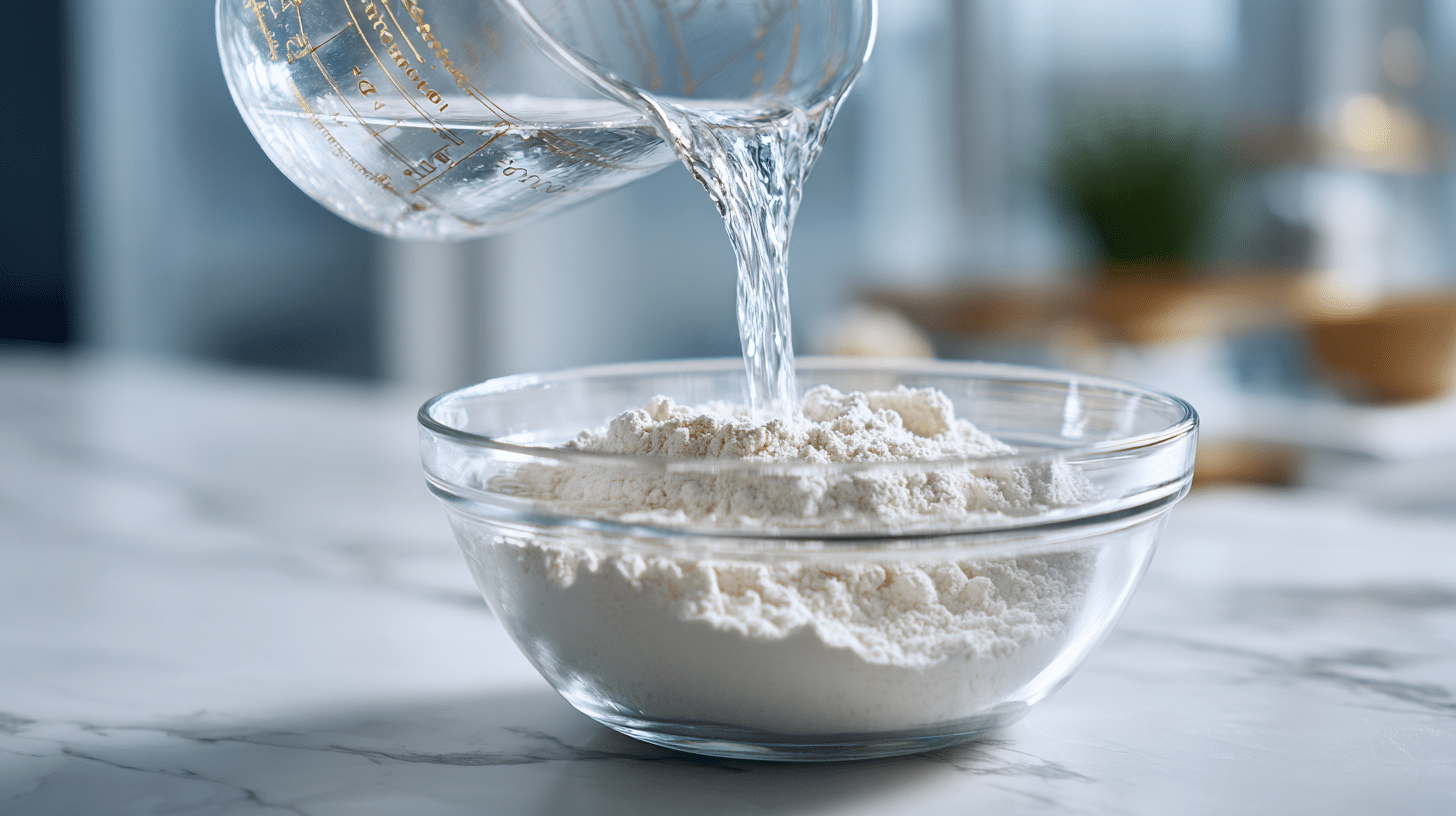
Slowly pour in the hot water, mixing gradually with a spoon or chopsticks until the dough starts to come together and no loose flour remains.
Add water slowly to prevent lumps and ensure even hydration. The dough should look shaggy but cohesive at this stage, with no dry flour pockets visible.
Pro Tip: Add water in three additions rather than all at once. This gives you better control over consistency and prevents the dough from becoming too wet.
3. Form Initial Dough
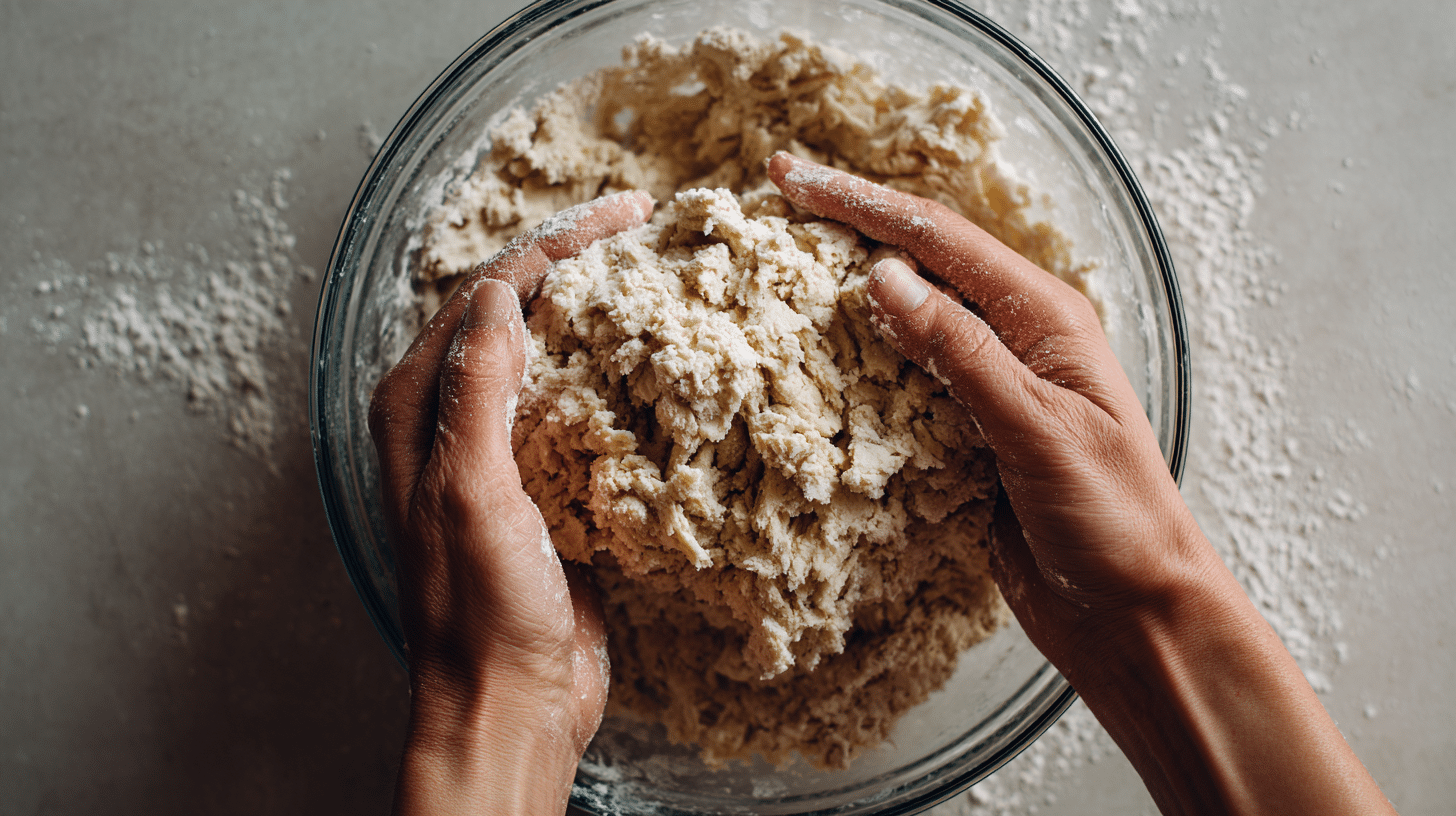
Use your hands to gather the dough and knead it in the bowl until it forms a rough ball.
The dough will feel quite warm at this stage. Don’t worry if it seems slightly sticky; the texture will improve with kneading and resting.
Pro Tip: If the dough feels too hot to handle comfortably, wait 2-3 minutes before proceeding. Working with overly hot dough can be uncomfortable and less effective.
4. Knead for Smooth Texture
Transfer onto a lightly floured surface and knead for 5-7 minutes until smooth and elastic. The dough should feel soft but not sticky.
Proper kneading develops the gluten structure that gives wrappers their characteristic chew and flexibility. The dough should become noticeably smoother and more elastic.
Pro Tip: The dough is ready when it springs back lightly when poked. Insufficient kneading results in wrappers that tear easily during folding.
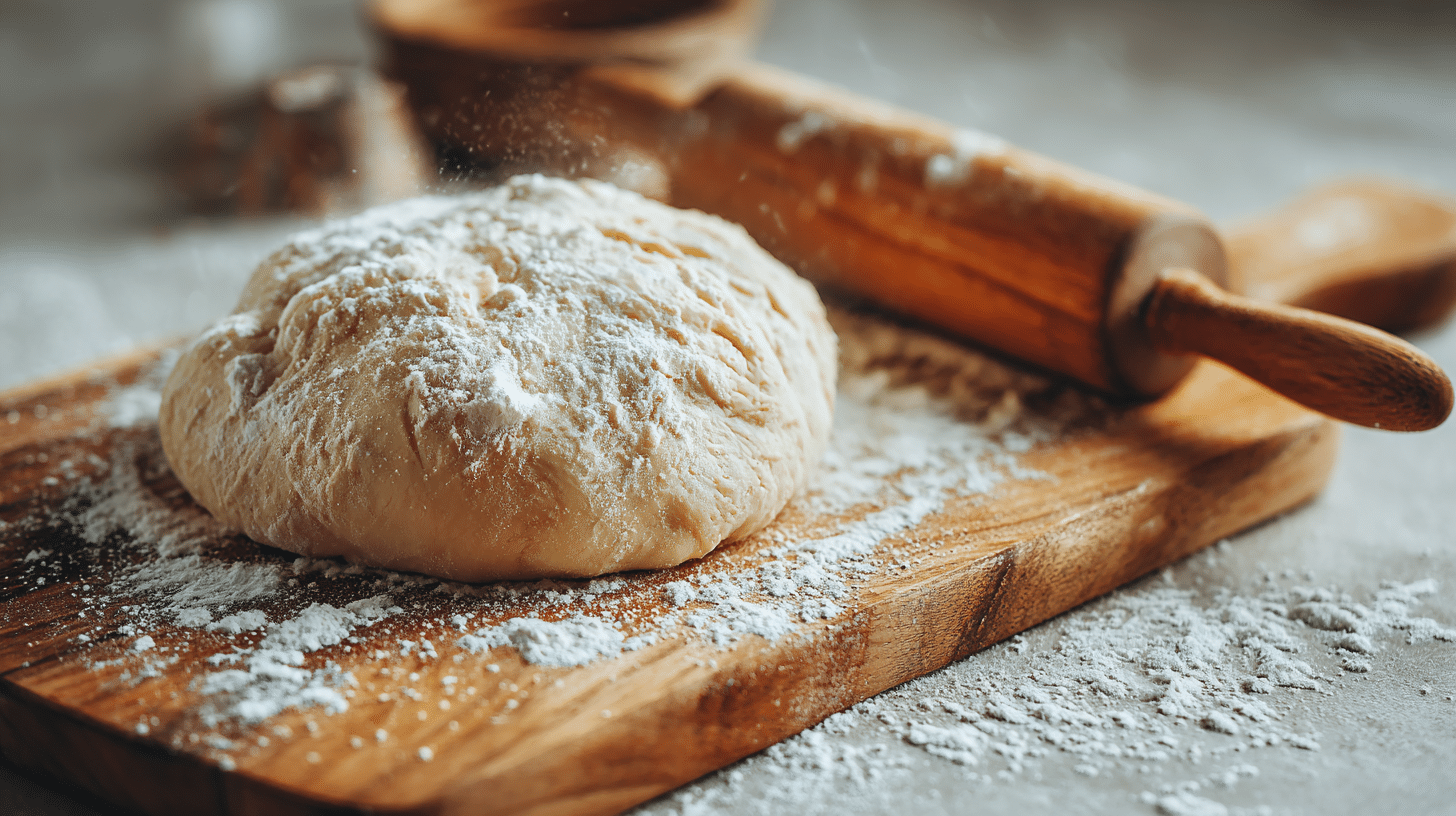
5. Rest the Dough
Cover with plastic wrap or a damp towel and let the dough rest for at least 30 minutes, up to an hour.
Resting allows the flour to fully hydrate and the gluten to relax, making the dough much easier to roll thin without springing back.
Pro Tip: For best results, rest the dough for a full hour. The extended resting time makes rolling significantly easier and creates a better texture.
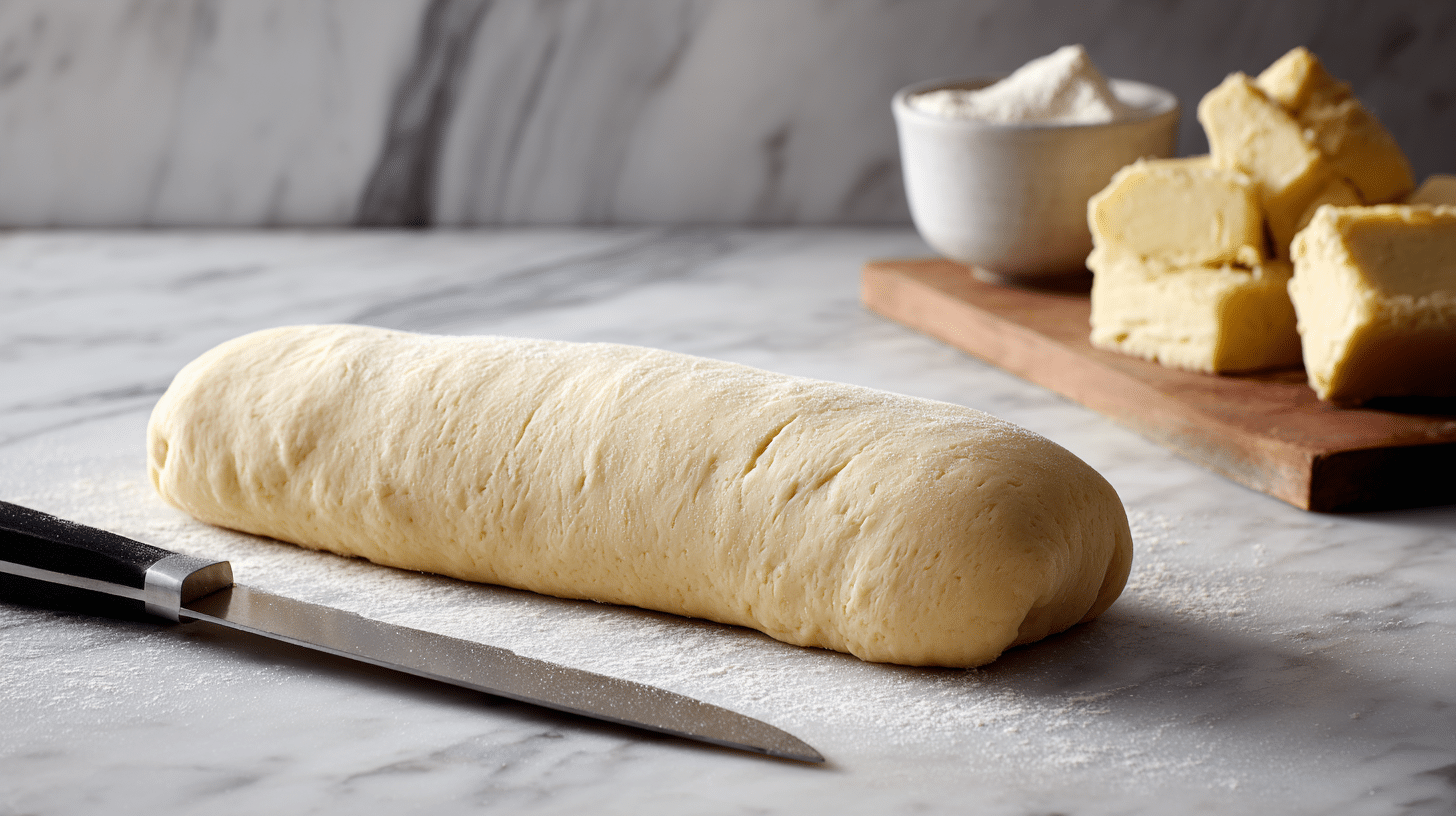
6. Divide and Shape
Divide the dough into 4 equal parts. Roll each part into a long cylinder, about 3/4 inch in diameter.
Keep unused portions covered while working to prevent drying. Uniform cylinders ensure consistent wrapper sizes for even cooking.
Pro Tip: Use a kitchen scale to divide dough equally if precision matters. Each quarter should weigh about 75-80 grams for consistent results.
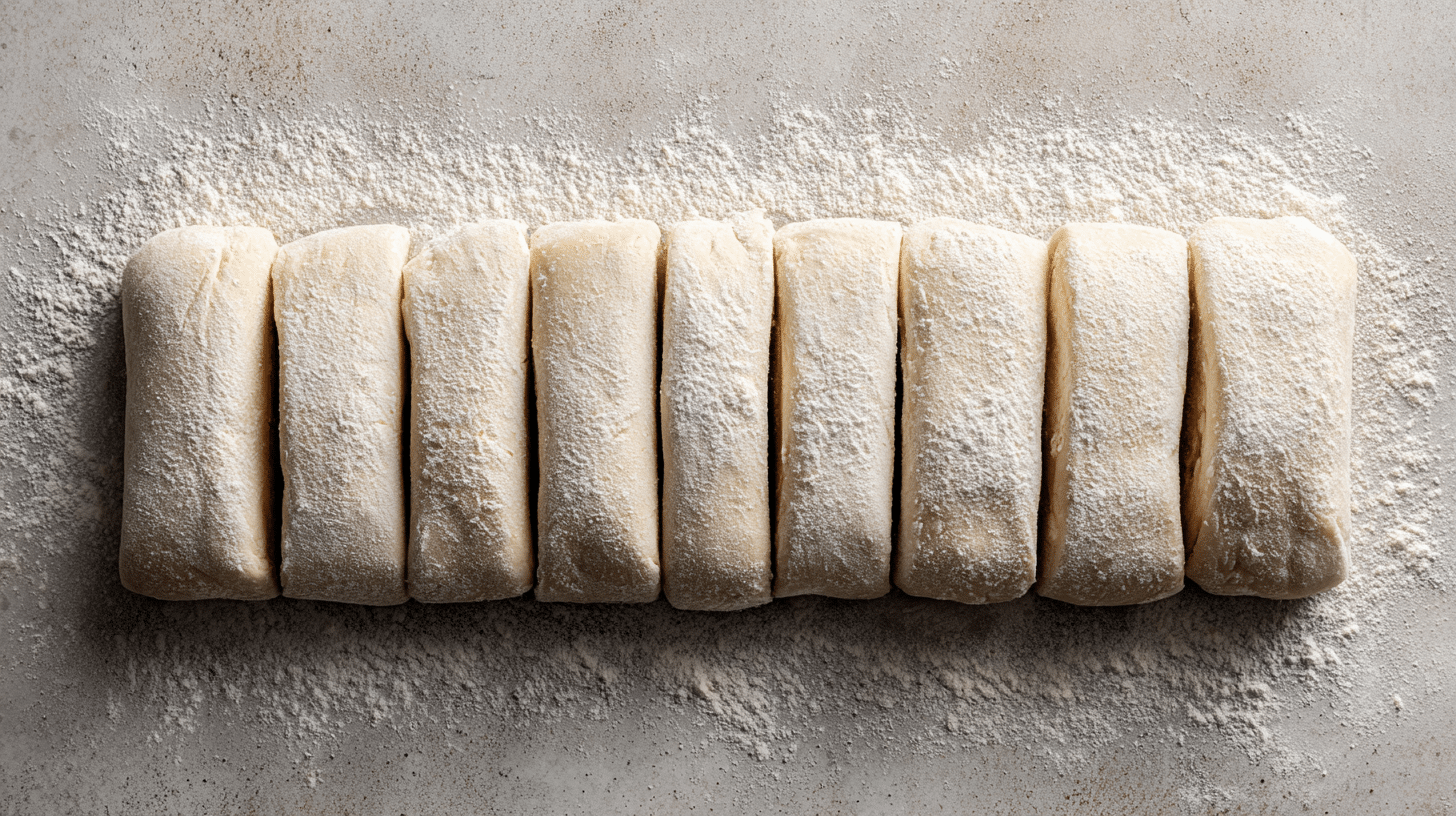
7. Cut into Portions

Cut each cylinder into 1-inch segments, with each segment weighing about 15g. This yields approximately 32 wrappers total.
Consistent sizing ensures all wrappers cook evenly and look professional. Cover cut pieces with a damp cloth to prevent drying while you work.
Pro Tip: Work with one cylinder at a time, keeping others covered. This prevents the cut pieces from drying out and becoming difficult to roll.
8. Roll Individual Wrappers
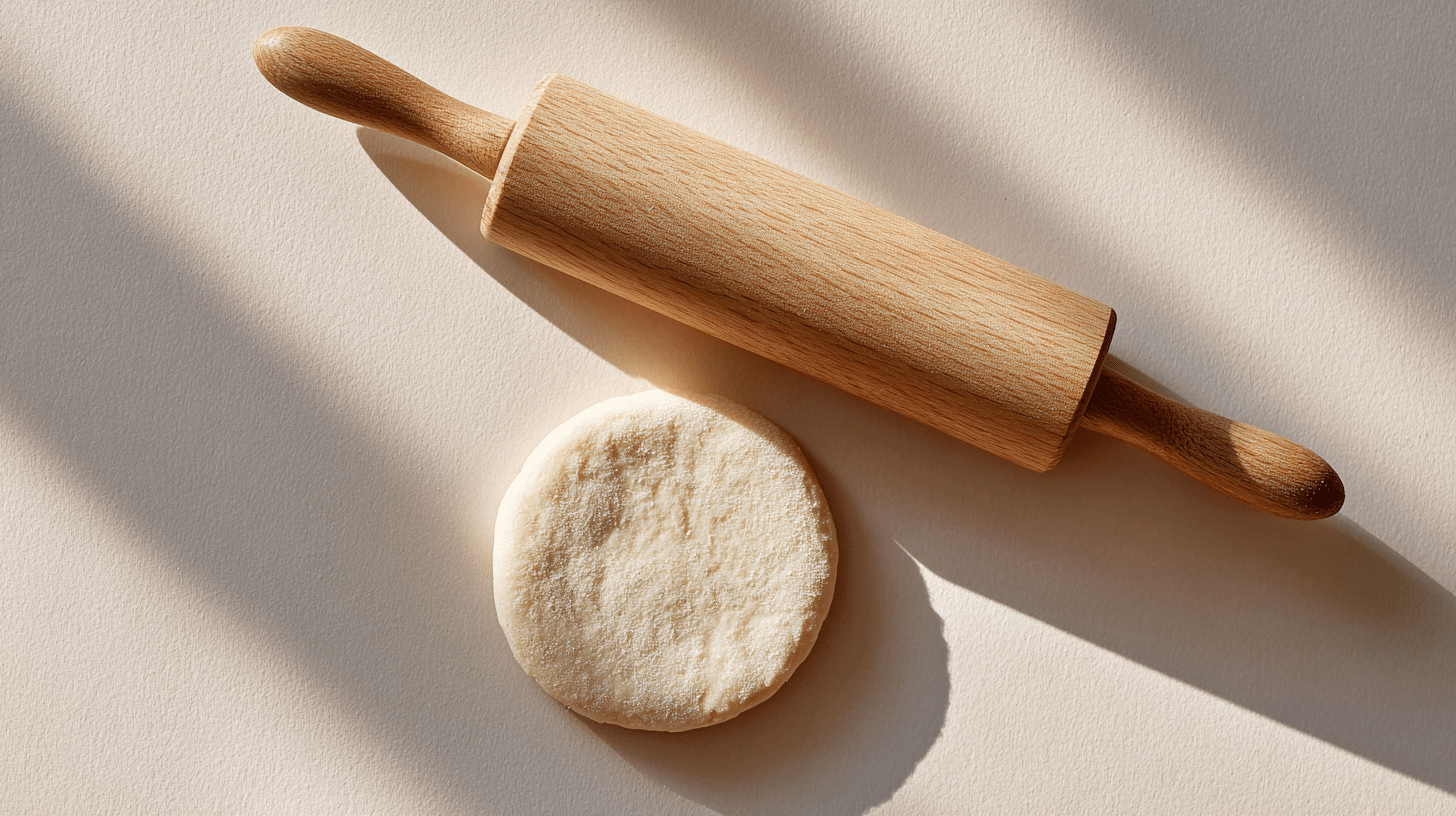
Roll each segment into a ball, flatten with your palm, and roll out into thin rounds about 3-4 inches in diameter. Focus on thinning the edges more than the center.
Thinner edges fold better without creating thick, doughy seams. The slightly thicker center provides strength where the filling sits.
Pro Tip: Dust both the work surface and rolling pin lightly with flour to prevent sticking, but don’t over-flour or the wrappers won’t seal properly.
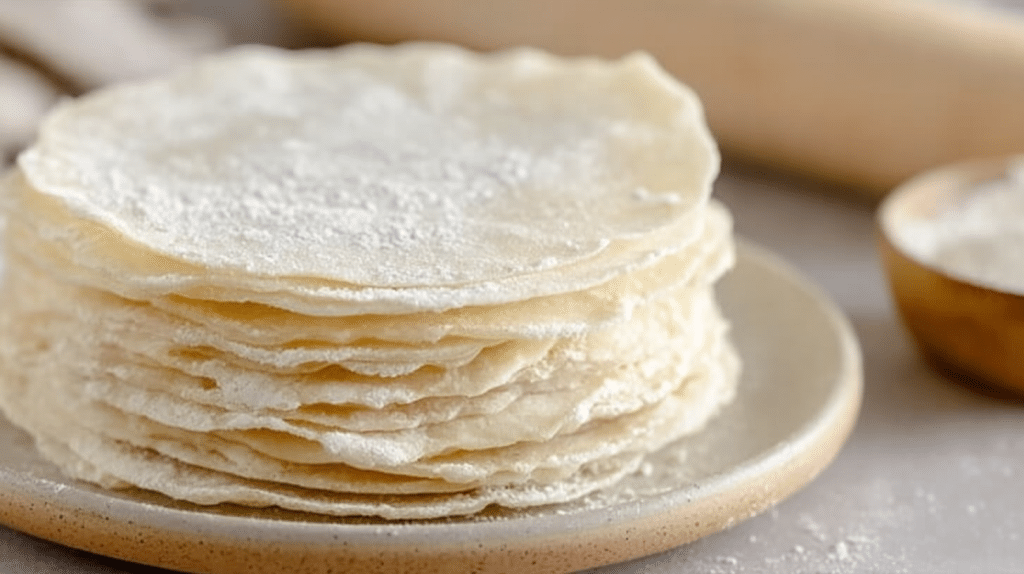
9. Store or Use Immediately
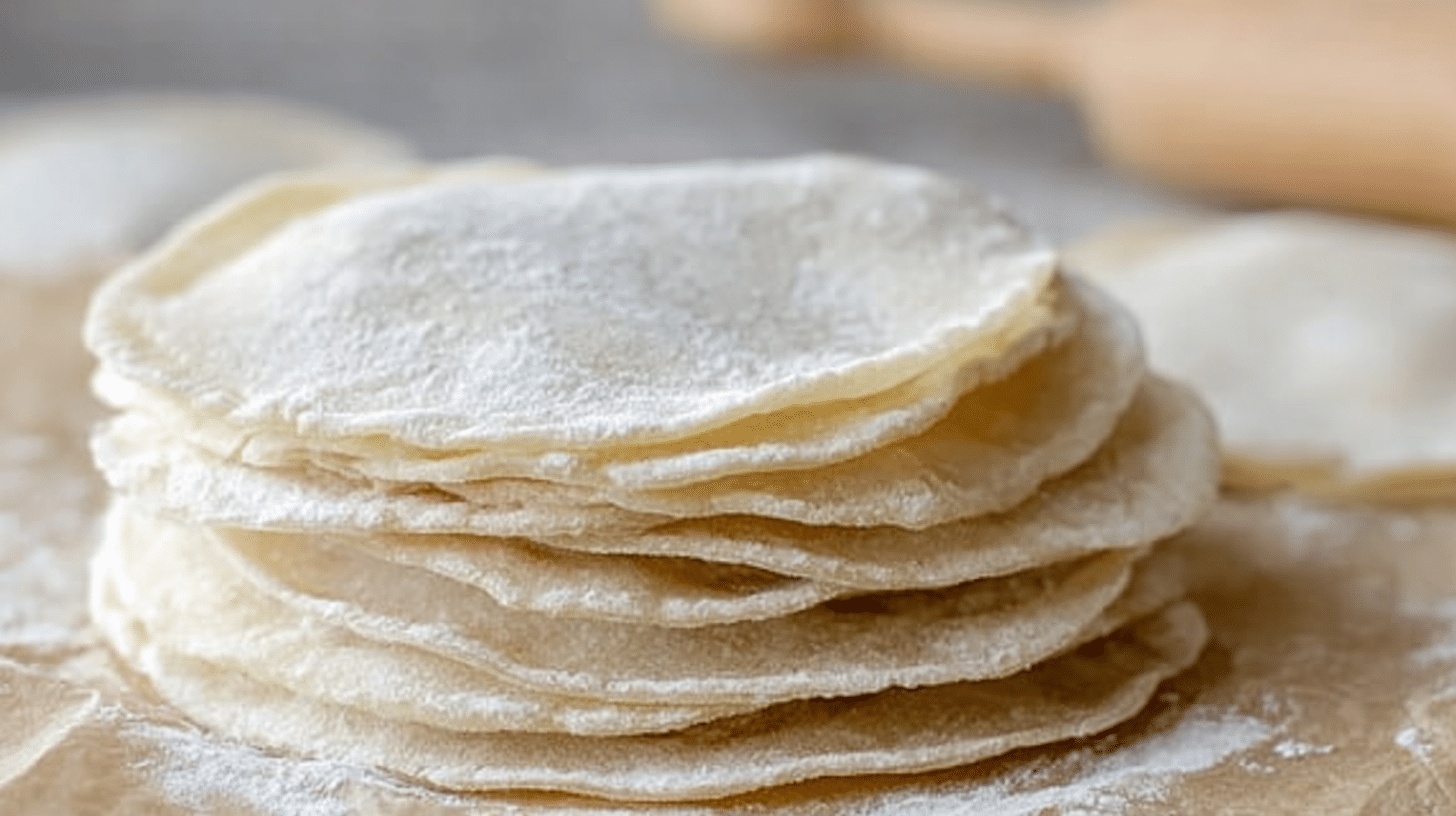
Dust wrappers with flour and use immediately, or stack with flour between layers and wrap airtight. Refrigerate for 2 days or freeze for 1 month.
Proper storage prevents sticking while maintaining flexibility. For freezing, place parchment between layers for easier separation when frozen.
Pro Tip: When freezing, arrange wrappers in single layers on baking sheets first, then transfer to containers once solid. This prevents them from freezing together.
Nutrition Facts
These homemade dumpling wrappers provide fresh, preservative-free alternatives to store-bought versions.
| Nutrition Information | Per Wrapper (15g) |
|---|---|
| Calories | 28kcal |
| Protein | 1g |
| Carbs | 6g |
| Fat | 0g |
| Fiber | 0g |
| Sodium | 37mg |
| Sugar | 0g |
Note: Values are approximate and based on 32 wrappers using all-purpose flour. These wrappers contain no preservatives or additives found in commercial versions.
Pairing Suggestions for Your Dumpling Wrappers
Complete your dumpling-making session with these complementary filling ideas and cooking methods:
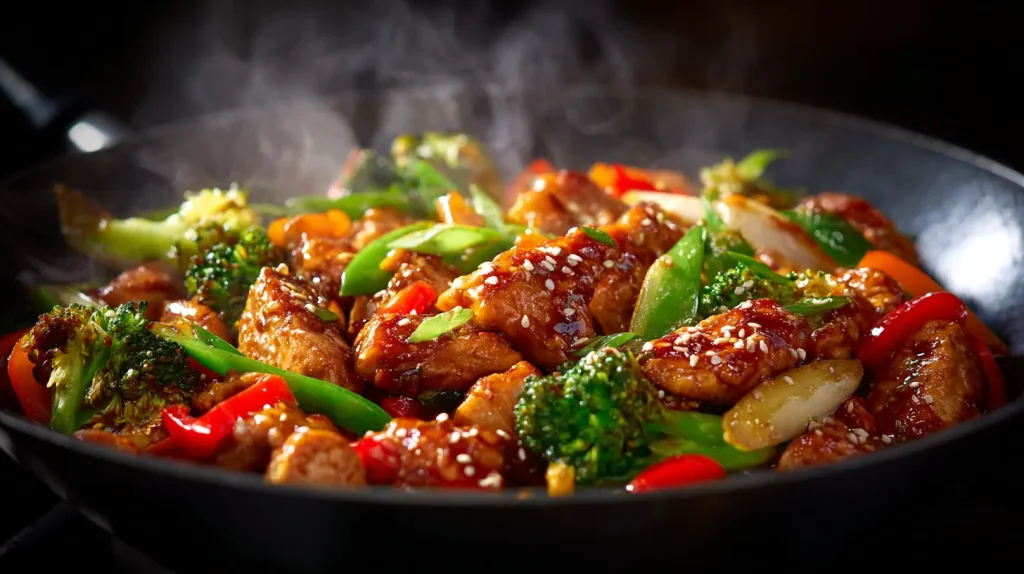
1. Classic Filling Options
The pork and cabbage combination provides traditional flavors that work perfectly with these tender wrappers.
Chicken and ginger filling offers lighter protein while maintaining authentic Asian flavor profiles that complement the wrapper texture.
2. Vegetarian Alternatives
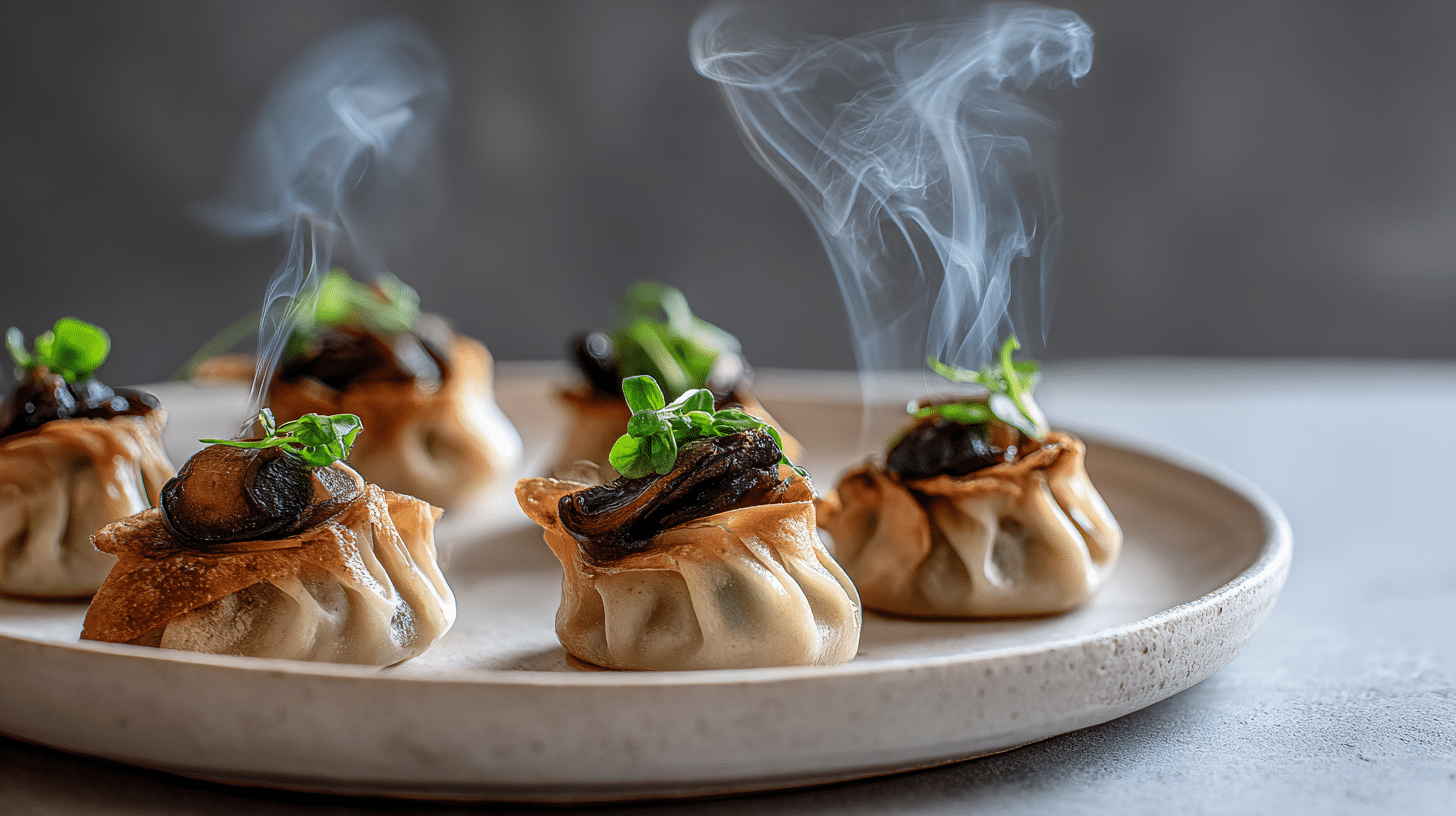
Mushroom and tofu mixtures create satisfying umami-rich fillings that pair beautifully with the chewy wrapper texture.
Cabbage and carrot combinations provide fresh, crisp textures that contrast nicely with the soft, pliable wrapper exterior.
3. Cooking Method Options
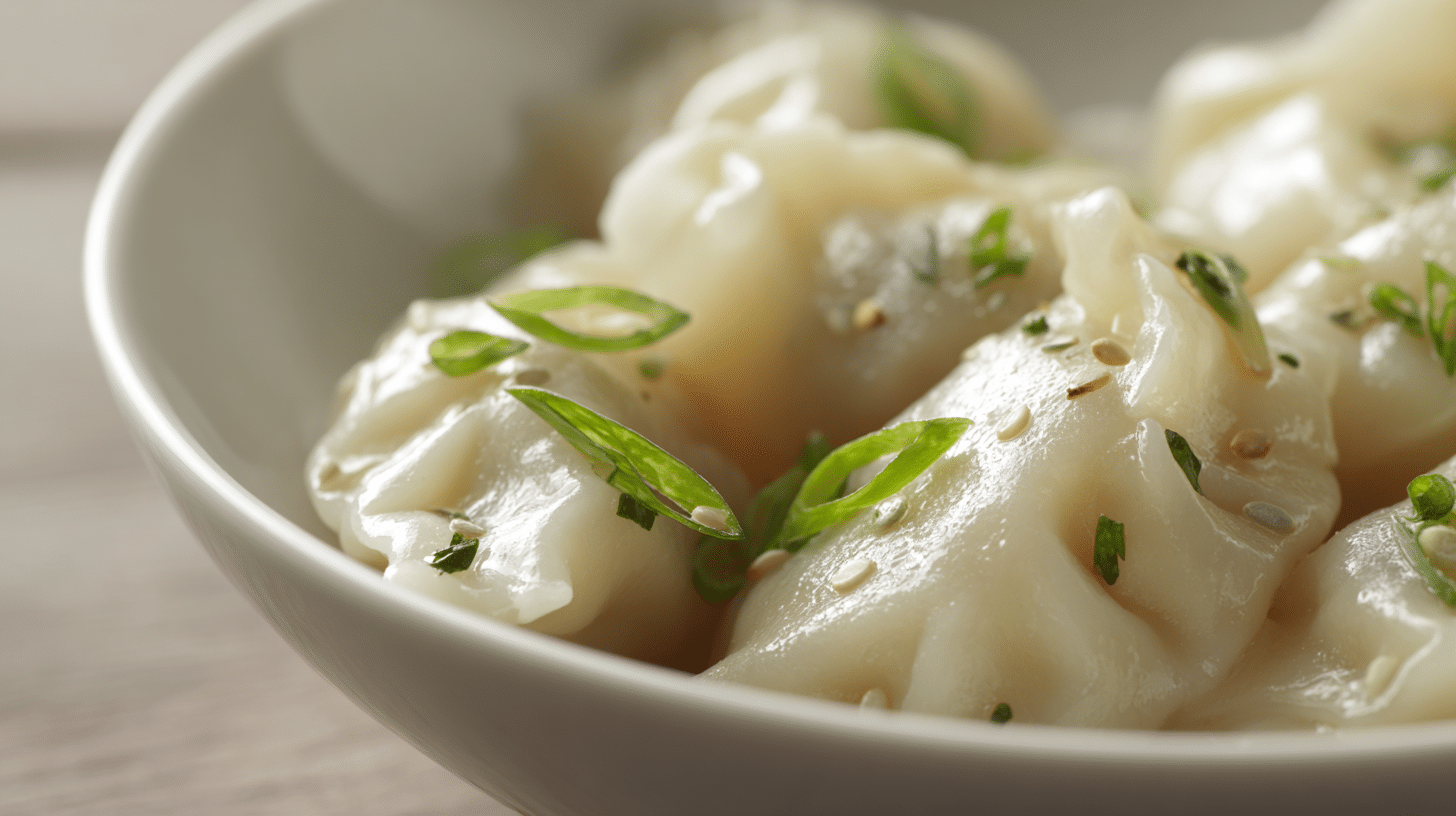
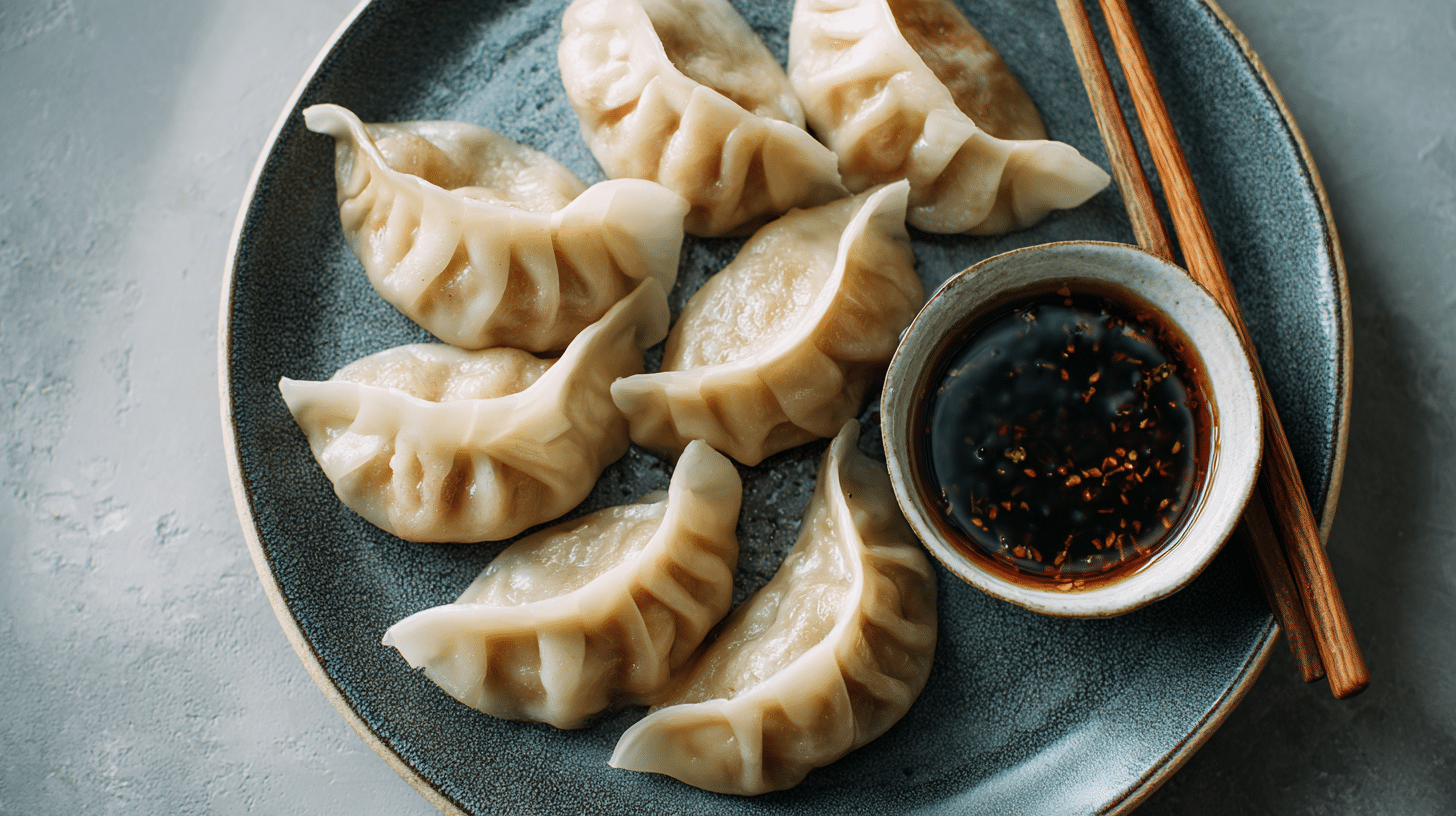
Boiling creates tender, silky dumplings that showcase the wrapper’s delicate texture and flexibility.
Pan-frying develops crispy bottoms while keeping tops tender, highlighting the wrapper’s versatility and strength.
Storage & Make-Ahead Tips
I’ve found these homemade wrappers store exceptionally well with proper handling:
- Fresh Storage: Keep covered with a damp cloth at room temperature for up to 4 hours. Use flour dusting to prevent sticking between layers.
- Refrigeration: Store wrapped airtight for up to 2 days. Bring to room temperature before using for easier handling and better flexibility.
- Freeze: Freeze in single layers, then transfer to containers for up to 1 month. Thaw overnight in the refrigerator before use.
- Batch Making: Double or triple the recipe and freeze portions. Having homemade wrappers ready makes dumpling preparation much quicker.
- Dough Storage: Unrolled dough keeps refrigerated for 2 days. Let it come to room temperature and knead briefly before rolling.
Pro Tip: I always make extra wrappers and freeze them in meal-sized portions. Fresh wrappers make such a difference in dumpling quality that the extra effort pays off tremendously.
Troubleshooting Common Issues
Master these wrapper-making techniques to achieve consistent, professional results:
1. Dough Too Sticky
Add flour gradually, one tablespoon at a time, until the dough feels smooth but not dry. Over-flouring creates tough wrappers that don’t fold well.
Sticky dough usually means the water was too hot or you added it too quickly. Next time, let the water cool slightly and add more gradually.
2. Wrappers Keep Tearing
This indicates insufficient kneading or inadequate resting time. Knead longer and rest the dough for a full hour for better gluten development.
Ensure water temperature stays within the 80-90°C range. Too cool water won’t create the right texture for flexible wrappers.
3. Hard to Roll Thin
Under-rested dough springs back when rolled. Cover the dough and wait another 15-30 minutes before attempting to roll again.
Work with smaller portions and keep unused dough covered. Exposed dough forms a skin that becomes difficult to roll smoothly.
Conclusion
This dumpling wrapper recipe gives home cooks the satisfaction of creating restaurant-quality dumplings from scratch.
The hot water method produces wrappers with superior texture and flexibility that store-bought versions simply cannot match.
Home cooks worldwide can master this fundamental skill and apply it to countless dumpling variations.
My recipe is ideal for individuals who appreciate the difference that fresh, homemade ingredients make in their cooking.
Share your dumpling wrapper success stories in the comments below! What fillings do you plan to try with these fresh wrappers, and how did the texture compare to store-bought versions?